Interior items, decor, and furniture made from aged wood can look cozy and attractive. We tell you how to choose a material for brushing, what methods there are, and how to brush wood yourself.
What is wood brushing
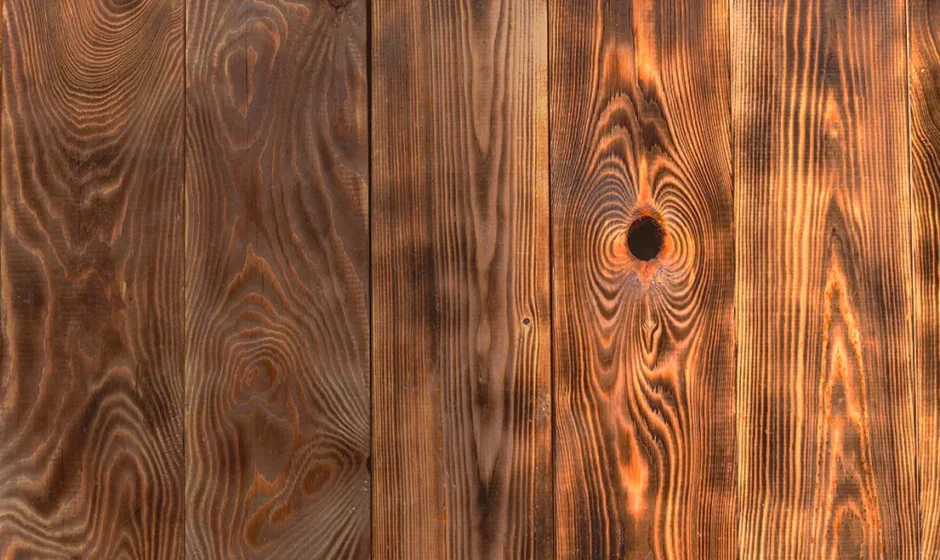
Brushing is a technique for artificially aging wood. Using special tools, the surface soft layer is removed from the wood, exposing its structure and relief. As a result, the surface of the wood becomes textured and looks as if it is many decades old and worn out over time.
Where is brushed wood used?
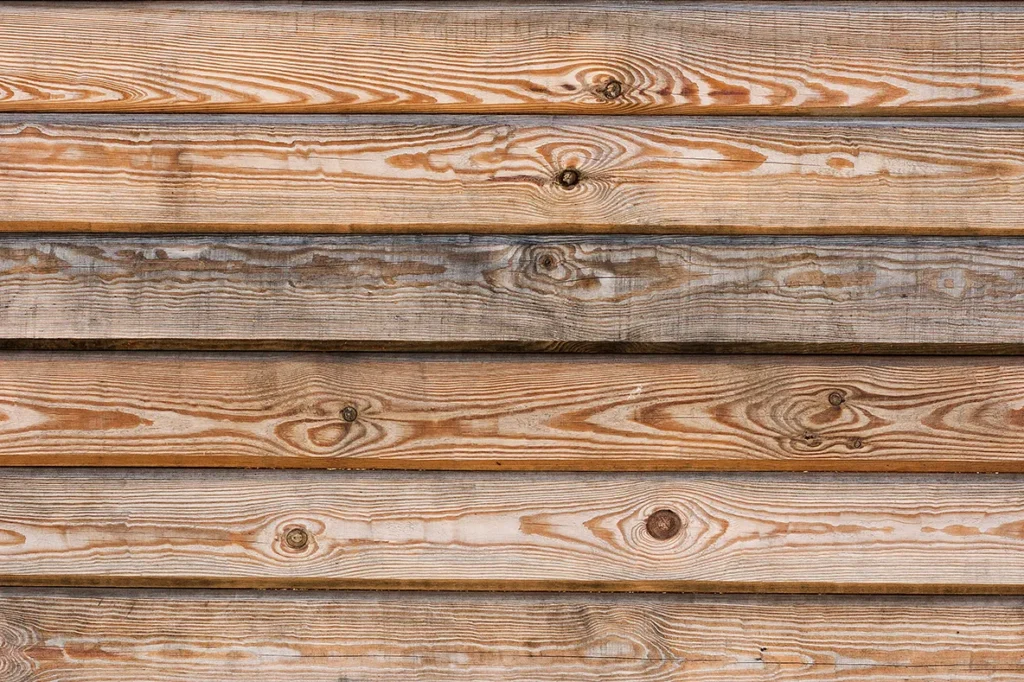
Brushed details are often chosen for interiors in country, chalet, and Provence styles. In addition, such decor can be found in classic and vintage styles, where interior items with history are valued. Most often, wooden boards of floors or walls and ceiling beams are brushed, as well as individual decorative elements: doors, stairs, furniture, mirror frames, and window sills.


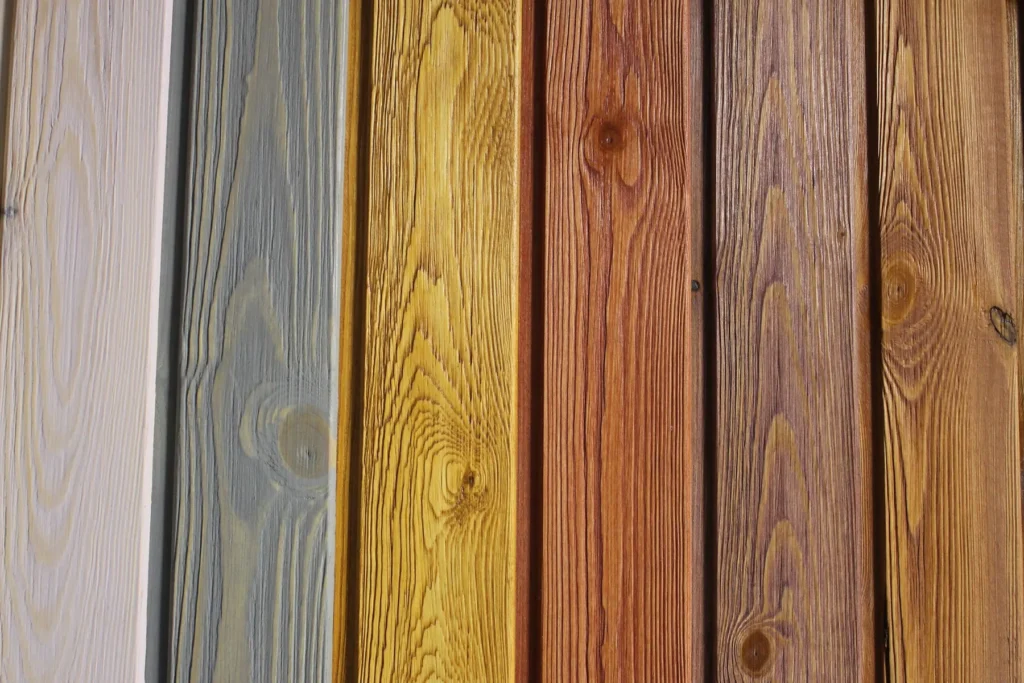
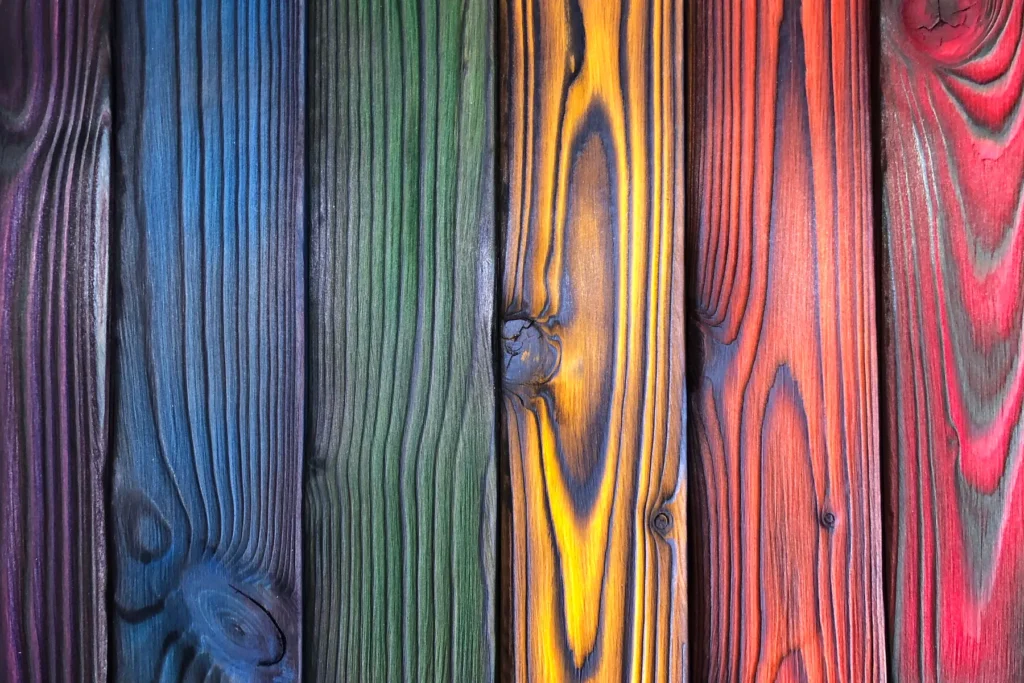
The texture of the wood can be emphasized with the help of paints, oils, and tinting antiseptics. The coloring pigment unevenly fills the depressions left after processing, and the pattern on the surface of the wood becomes more pronounced. In addition to staining, brushing can also be combined with patination, a technique that enhances the temporary changes of a wooden surface by painting it with two different colors.
What kind of wood can be brushed
In most cases, strong boards made from soft and medium-density wood species are chosen for brushing. Coniferous wood is suitable: spruce, larch, pine, cedar, and fir. You can also choose deciduous trees: aspen, linden or alder. Soft and medium-density wood is easier to process and gives a pronounced relief. Hardwoods such as oak, ash, and walnut can also be brushed, but the grain on them will be less noticeable.
Most often, untreated lumber is brushed, but you can also take wooden products – lining and unsanded plywood. In this case, the surface must be processed carefully and only by hand, without tools, so as not to break the fragile material.
Brushing on low-quality wood will look interesting. These include the third and fourth grades of lumber, which manufacturers do not buy due to the presence of wood defects: marks from knots and cores, cracks, or chips.
Designers, on the contrary, choose such boards to create unique decorations and furniture. The more defects there are on the wood, the more unusual the pattern will be after brushing. Such a bright pattern cannot be achieved on select and first-grade boards.
Brushing methods
Brushing wood is done in three ways:
- thermal burning – using fire
- chemical burning – using alkaline and acidic solutions
- mechanical – using different tools and brushes
The choice of method depends on the experience of the master, the amount of work, and the desired result. If you are a beginner, choose the safer mechanical method. The effect of mechanical processing can be enhanced by chemical burning. More experienced craftsmen can try thermal burning or a combination of different methods.
Thermal burning
Thermal burnings is used when you want to get the effect of not just aged, but also charred wood. Such boards can be used to decorate gazebos or rafters on the veranda.
To age wood thermally, it is first burned with a gas burner or blowtorch to a depth of 2-3 mm, and then the carbon deposits are removed manually using a brush. As a result, the longitudinal lines of hard growth rings become dark, and light veins remain in place of soft fibers. Remove any remaining soot with a napkin.
Be careful when working with a torch and blowtorch – carefully, using the handle, adjust the strength of the open flame. Work outside in calm weather. There should be a fire extinguisher near the workplace.
Move the burner evenly, without stopping, so that the workpiece burns evenly. If the flame is high, keep the burner 25–30 cm away from the board. Choose the degree of firing yourself: from light darkening to almost black, depending on the desired result. The intensity of firing and the color of the wood depends on the number of processing approaches: the more there are, the darker and “older” the wood is. After processing, the wood can be coated with varnish or wax .

Chemical burning
For chemical brushing, acids (boric, sulfuric, or hydrochloric), and solutions of ammonia, sodium, or potassium hydroxide are used. The liquid is applied to the wood with a brush or rag. Contact with chemicals causes softwood fibers to darken and dry out. Depending on the type of wood, the chemical reaction can take from 30 minutes to several hours. Solutions evaporate quickly, so for better effect, the procedure can be repeated several times.
After the relief appears, the wood is washed with water, while simultaneously passing over the surface with a brush to remove any remaining fibers. Afterwards, you can additionally treat the wood with fine-grained sandpaper to make the relief more noticeable. At the end, the wood can also be coated with varnish or wax to add gloss.
Work with chemicals outside or in a well-ventilated area. Before doing this, put on gloves , protective suit , goggles and a respirator.
Chemical treatment is rarely used: it is long, dangerous and requires special knowledge – you need to know in which case to use this or that chemical. Sometimes chemical brushing of wood is combined with mechanical brushing to speed up the work: soft fibers are removed by chemical treatment, and the relief is ground by mechanical sanding.
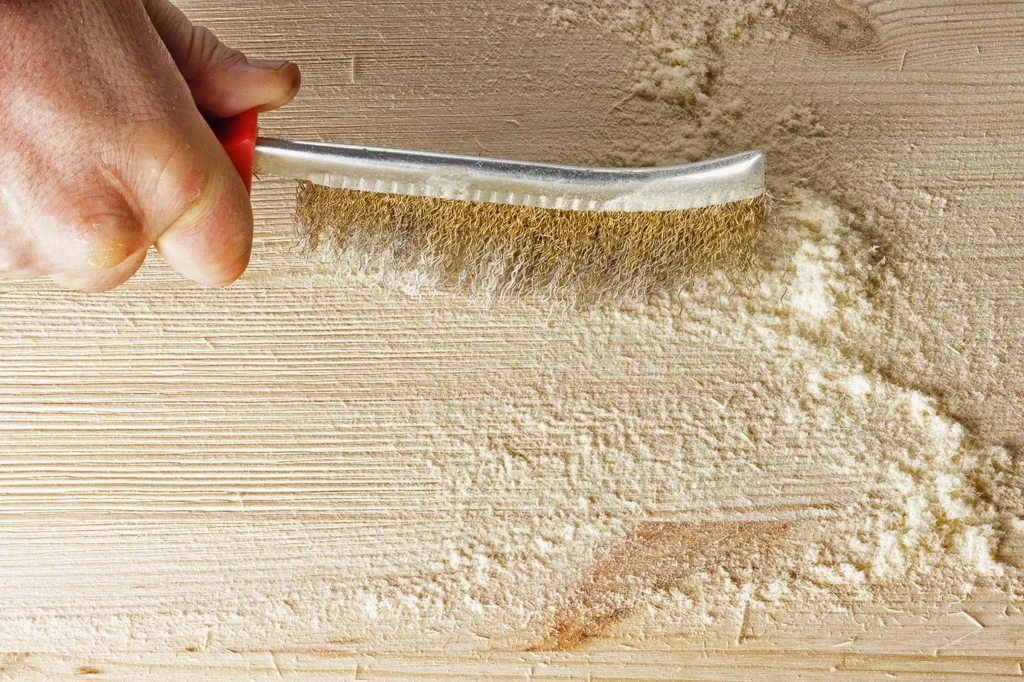
Mechanical method
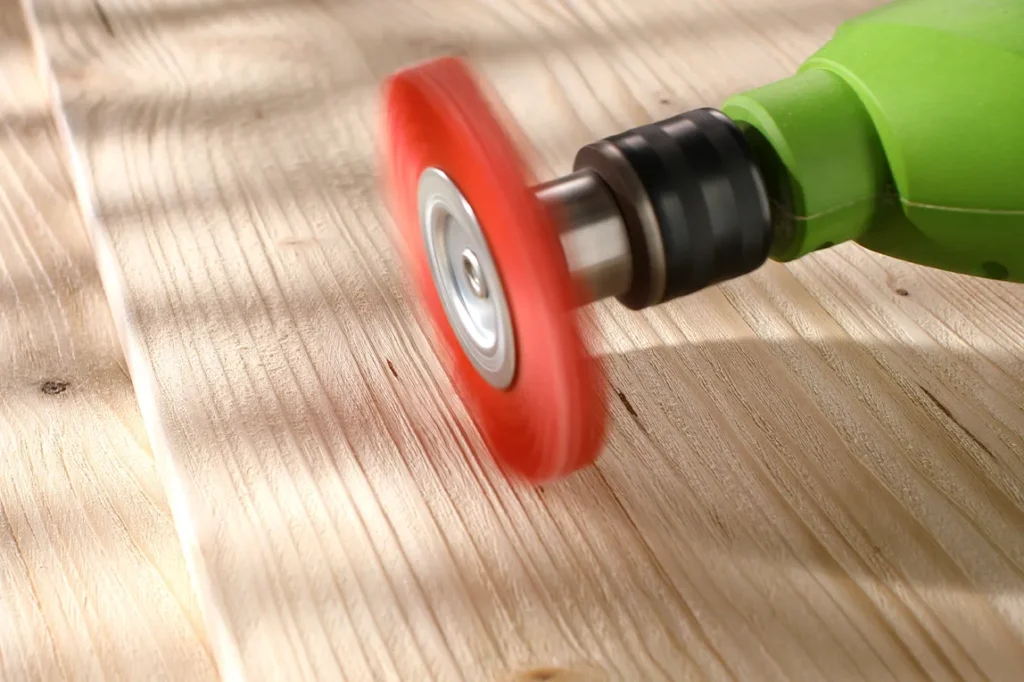
To age wood mechanically, you need brushes with bristles made of metal and nylon, sandpaper, or sponges with an abrasive layer. Processing can be carried out manually or with a grinder with special attachments – brushes. This is the most common method of do-it-yourself brushing at home.
Mechanical brushing can be light or deep. Light texturing is applied only to softwoods. In production, the material is passed through a wood aging machine, which removes the top layer of fibers. At home, this can be done using a hand brush or a sander with a brush attachment.
Deep texturing is also performed using a sander with attachments or on a machine, but this is done with stronger pressure. It is suitable for hardwood so that the pattern becomes brighter, or for soft wood so that the wood has a clearly defined texture.
How to brush wood
For brushing, choose clean, dry boards. If you take wet wood, then during processing and sanding, instead of a smooth relief, a “pile” is formed on the surface of the wood from fibers that have not separated from the wood.
First, sand the wood with a stiff brush or sander with a brush attachment. For work, choose brushes with metal bristles that will remove the top layer of soft fibers. Adjust the number of brush passes and pressure to achieve the desired depth of relief. Do not press too hard, otherwise you can remove the hard growth rings along with the soft fibers. When working, take into account the direction of movement: the brush must go along the fibers so that the pattern appears.
Then take a brush with softer nylon fibers and go over the entire surface again. A nylon brush will carefully sand the surface of unseparated fibers and create a more textured surface. After processing, use a brush to sweep away any dust remaining in the cavities between the fibers.
At the next stage of brushing the wood, you need to remove the smallest fibers so that the board does not cling to clothes and you cannot get splinters on your hands. Take sandpaper of any grit. The smoother the surface you want to get, the smaller the sandpaper grain should be. After sanding, brush the surface again, and then turn the board over and tap the workpiece to completely knock out the dust.
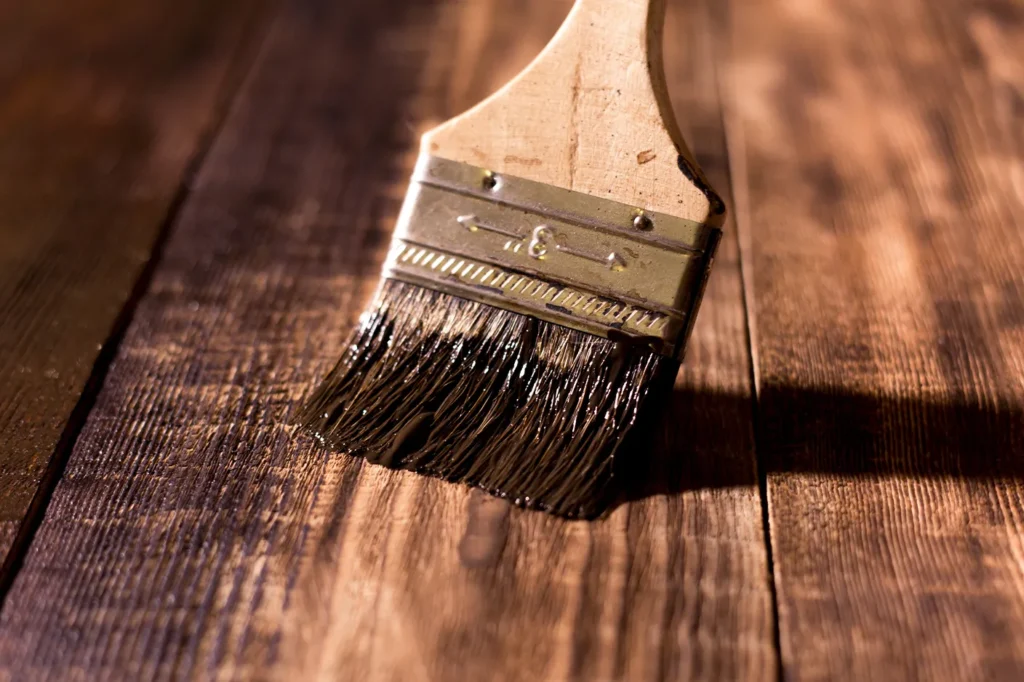
Now you need to treat the wood with a protective agent to extend its service life. If you do not plan to paint the wood, then choose a stain or oil; if you do paint it, choose a wood primer.
The liquid protective agent is applied with a brush, and the oil with a sponge or rag, so that the material is rubbed more tightly into the surface and the lines of the growth rings are brighter.
You can apply paint or transparent varnish (glossy or matte) over the protective agent, or you can leave it uncoated. Before applying any coating, wait until the protectant is completely dry – this will take a couple of hours.
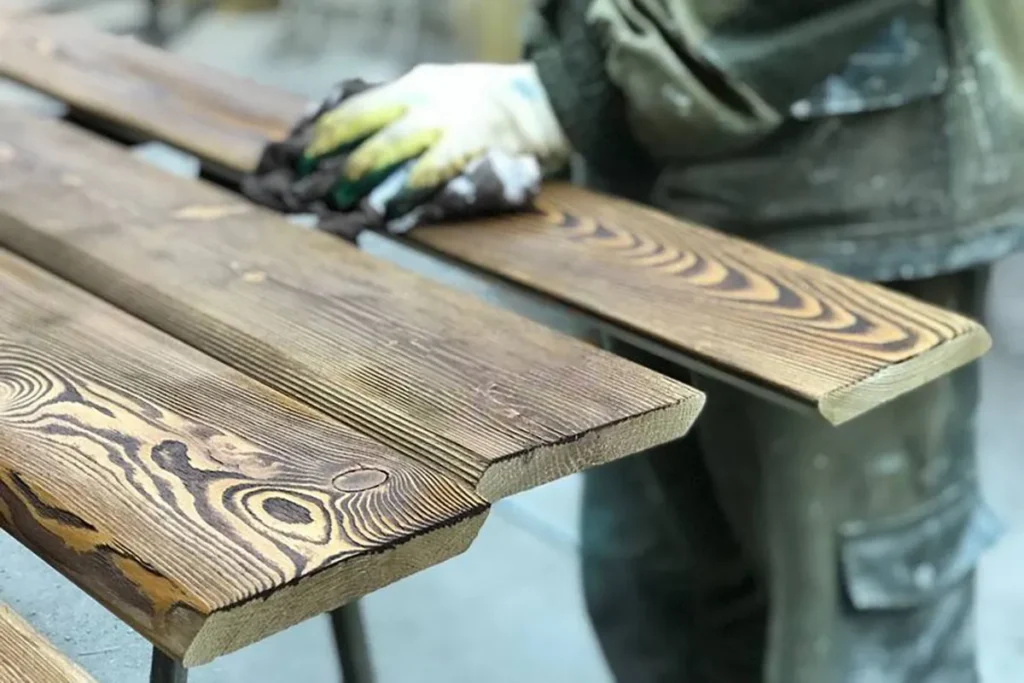
Apply the first coat of paint. Depending on the manufacturer and composition, the paint will dry in 2 hours. When the first layer of paint has dried, the surface can be sanded with sandpaper or a sponge with an abrasive – this will make the relief appear more clearly. Painting can be repeated a couple more times, each time polishing the layer with an abrasive. It is better to varnish in one – at most two layers, so as not to smooth out the grooves in the relief. Both paint and varnish hide the relief, so this method is suitable for wood with deep texture.
If you want to achieve a patina effect, paint the wood a dark color with a brush. When the paint is dry, apply a lighter shade over it, covering the first layer. This should be done with a semi-dry brush. Once the paint has completely dried (about 1 or 2 days), gently sand the surface with medium-grit sandpaper until the underlying layer or even the wood itself begins to show through the top layer. At the end, the treated surface can be varnished.
Summary
Brushing will help to artificially age the wood and turn a simple board into a unique decorative item. Wood can be processed mechanically using metal and nylon brushes and sander attachments, burned with an open fire, or using chemicals. It is safest to process wood mechanically. After treatment, the surface must be protected from moisture using oil, stain, or wax.
Brushing wood goes well with painting and patination. In this case, the wood is first brushed, then treated with a primer and painted or varnished.
Brushed wood is most often used in rustic styles: country, Provence, and chalet, although aged furniture can also be found in classic interiors.