Tiles are one of the most popular finishing options for bathrooms, toilets, and kitchens, but the work of tilers is often quite expensive. In this article, we will talk about how to properly glue tiles to the floor and wall with your own hands.
HOW TO GLUE TILES: PREPARATORY STAGE
To work you will need the following tools:
- Notched trowel for applying glue. The height of its teeth depends on the size of the tile; the descriptions of our mixtures contain approximate figures.
- Auxiliary smooth spatula.
- Measuring tools – pencil, chalk, chalk thread, tape measure, level, plumb line, ruler.
- Plastic cross-shaped spacers for demarcating seams and leveling their width.
- Cutter, tongs, and router bits to give some tiles a unique shape.
- A drill with a nozzle for preparing glue and a bucket of sufficient volume.
- Protective gloves, sponges, and rags.
This set of tools is enough for installing a simple rectangular kitchen apron, as well as for finishing the floor in a bathroom or bathroom with shaped cutting of tiles to obtain technical holes for communication pipes and plumbing fixtures.
LAYING TILES ON THE FLOOR: HOW TO CHOOSE
When choosing tiles for walls, first of all, pay attention to their decorative and aesthetic qualities. But for floor tiles, strength characteristics are very important:
- In the bathroom, the mechanical load on the floor is low. Therefore, here (as well as for wall decoration) you can take tiles with the lowest abrasion class. In addition, the technology for laying tiles in the bathroom involves choosing a material with a rough surface. This way you will provide yourself with additional safety by eliminating the risk of slipping on a glossy wet floor. For the bathroom floor, it is better to choose monotonous solutions, without bright and colorful inclusions, so as not to impair visibility.
- For the kitchen, you need to choose tiles of the third class of abrasion, which are well resistant to impact loads, as well as chemically and thermally aggressive substances. Another plus is that such tiles are easy to clean. But at the same time, you should not put textured or porous tiles on the kitchen floor or walls; its main disadvantage is that the shallow surface texture will collect dirt and grease deposits, which will be very difficult to remove.
- In the hallway, the strength of the floor covering is the most important parameter. Here, the optimal choice would be tiles with the fourth class of wear resistance. Considering that in autumn and winter, dirt, water, melted snow, and ice brought with shoes may appear in the hallway, you should think about buying a material with a surface that has an anti-slip effect.
To determine how many tiles you will need, measure the area you plan to decorate and divide that figure by the area of one tile. But there is one catch – some tiles will have to be cut into pieces to cover corners and other “non-square” areas. Usually, this takes another 10–15% of the total amount of material.
SELECTION OF GLUE
The tiles are laid using a special cement-based adhesive with the addition of various additives and modifiers that increase their performance characteristics. The correct selection of adhesive composition is as important as the choice of tiles. In particular, when choosing, you need to consider the following:
- Compatible with different types of tiles. The choice of adhesive largely depends on the type of facing material. So for ceramic tiles with normal water absorption, in most cases, class C0 adhesive will be sufficient. For porcelain tiles, you should already choose more expensive adhesives of at least class C1. For large-format slabs, elastic cement adhesives of class C2 S1 should be chosen.
- Tile weight. When laying thick tiles on walls, you should choose adhesives with increased resistance to slipping. When tiling floors, this parameter does not affect the choice of composition.
- Type and levelness of the base. Cement adhesives have high adhesion to most mineral substrates. However, it should be taken into account that when covering gypsum-based bases, they should be primed in advance using a high solids primer or treated with acrylic waterproofing. With direct contact of cement adhesive and gypsum base in the presence of moisture, the formation of the so-called cement bacillus will occur and, over time, the lining will be destroyed. Also, if it is necessary to lay tiles on an uneven base, you should take into account the recommended thickness of the adhesive application.
WHAT WORK NEEDS TO BE PERFORMED BEFORE INSTALLATION
Installation is carried out in several stages, each of which affects the quality and durability of the coating. Let’s take a closer look at each of them.
PREPARING THE BASE
Before laying tiles, the floor should be thoroughly dried and cleaned with a broom and vacuum cleaner. It is necessary to get rid of any stains of paint and other contaminants, as they will interfere with the quality of adhesion of the glue to the surface. It is necessary to remove all uneven floors and eliminate differences in height by making a new screed.
The walls should also be cleaned of any old coatings, and then plastered under the beacons, reinforced with construction mesh. But you shouldn’t putty the walls and reduce their smoothness to “zero” – the rough surface of the plaster will ensure better adhesion of the adhesive. Small differences in height will also not become a significant problem; tile adhesive will allow you to level out relief imperfections of 1–3 mm or more in height if a specialized composition is chosen.
WATERPROOFING
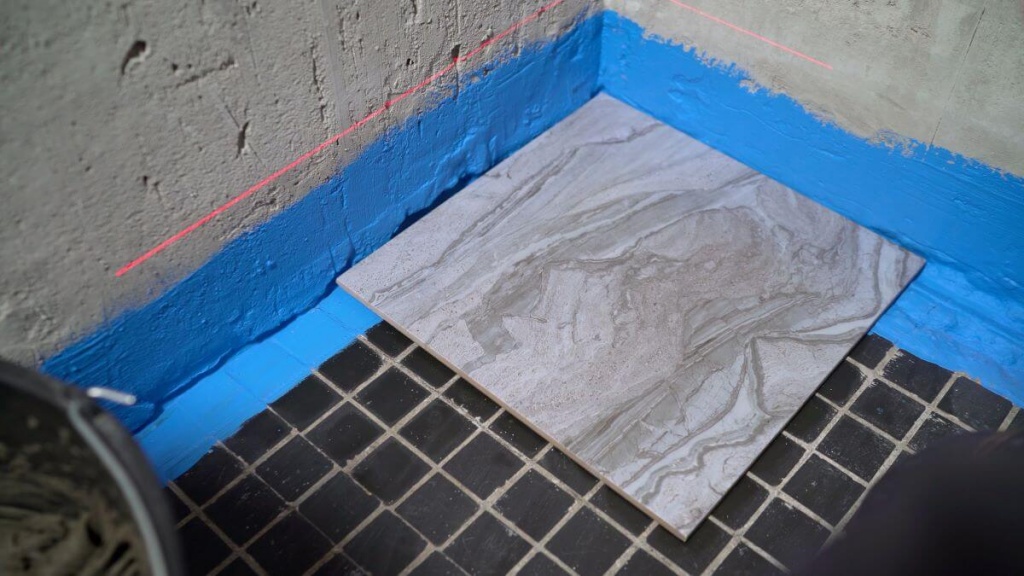
Waterproofing work is not mandatory but is highly recommended. Firstly, high-quality protection from moisture will preserve the integrity of the tile adhesive layer for a long time, eliminating the appearance of cracks, the proliferation of bacteria, fungi, and the occurrence of unpleasant odors. Secondly, it will prevent the neighbors from flooding if the bathtub accidentally fills up over the edge, or the liner, joint, or pipes are damaged. For waterproofing, a wide range of coating compositions has been developed, which are dry mixtures diluted with water or a polymer component, or ready-made acrylic-based liquid compositions. They are applied to surfaces using a brush, roller, or spatula, and dry quickly, forming a monolithic protective coating. Not only the floor in the room is covered, but also the wall to a height of 20–40 cm. All corners should be taped with special waterproofing tape.
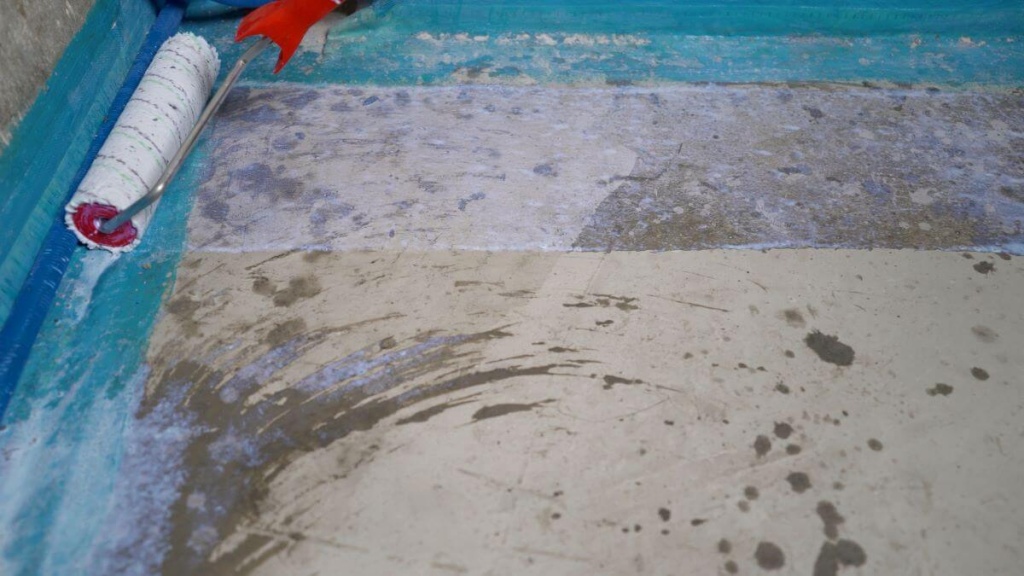
PRIMER
It is most convenient to use ready-made primers. Before use, be sure to read the instructions on the package and follow them exactly. Apply the primer in an even, thin layer using a painting tool. If the base is highly absorbent, it may be necessary to re-apply the primer after the previous one has dried (approximately 3-6 hours). Gluing tiles to a primed surface can begin 3–6 hours after applying the last layer of primer. The procedure allows you to normalize the absorbency of the surface, as well as carry out dust removal, which will have a positive effect on the adhesion strength of the adhesive to the surface of the floor or wall.
TECHNOLOGY FOR LAYING TILES ON THE FLOOR AND THE WALL WITH YOUR OWN HANDS
First, you need to make markings along which you will later install the tiles. In this case, plumb lines are used for the walls, and chalk cords are used for the floor. You should also install cross-shaped supports for the first row of tiles.
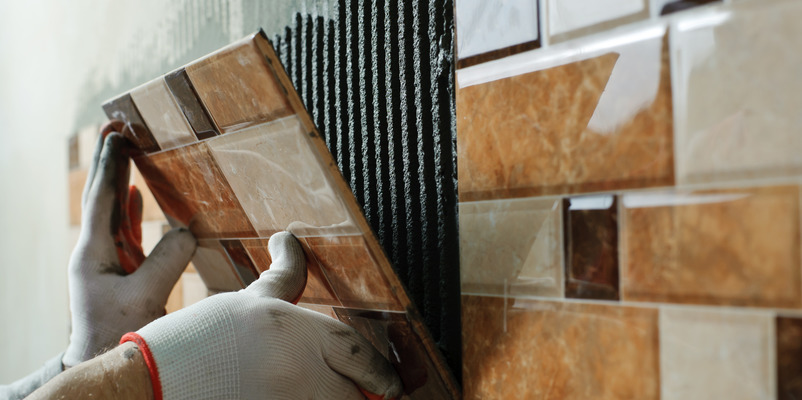
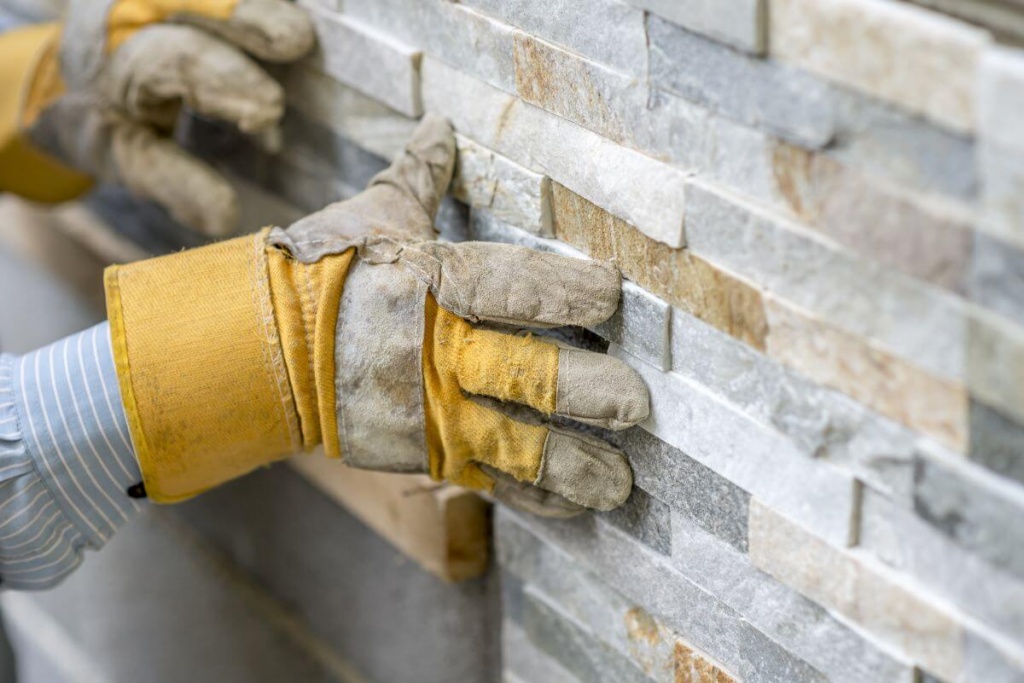
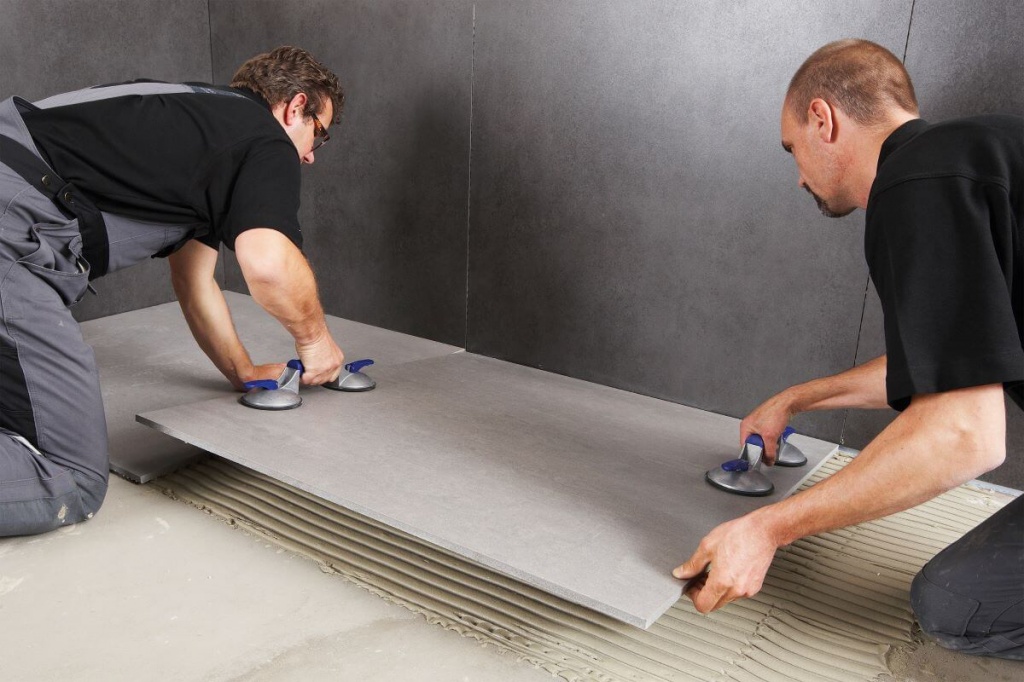
Apply tile adhesive using a notched trowel. The thickness of the layer should be approximately equal to the height of the teeth. Carefully place the tile on one side of the crosses, and then lay it on the floor or lean it against the wall, lightly pressing the mortar. Please note that removing a separate tile after it has come into contact with the adhesive is quite difficult, so try to position it correctly immediately. You should move the tile slightly so that the adhesive is evenly distributed under the tile. Make sure the layer is even when applying. If excess appears, it will be problematic to level it in height. If the quantity is insufficient, voids may form, which over time will lead to cracking of the finish.
Follow the correct order of laying tiles in the bathroom and other rooms: start filling corners and joints with cut fragments of ceramics only after all intact tiles are in place. If you choose a material with a pattern that requires adjustment, it is better to assemble it completely in another room in advance and then move it in parts so that there is no confusion during installation.

You need to work as quickly as possible until the glue begins to set. You should not lay tiles on dried mortar – the adhesion between the tile and the surface will be greatly weakened. The protruding tile must be leveled with a rubber mallet, and the recessed tile must be removed and the mixture added underneath it. The solution must be prepared taking into account the installation speed, so that the finished mixture is no more than enough for the installation of 3–8 tiles if you do not have work experience. This way you can avoid haste due to the hardening of the solution and eliminate the appearance of waste in the dried mixture.
WHAT GLUE TO USE
It is best to use specialized adhesives based on the type of tile and operating conditions of the cladding. Thus, adhesive for bathroom tiles must have high moisture resistance. For laying porcelain tiles on a heated floor, it is better to use reinforced adhesive
METHODS OF LAYING TILES
There are several basic ways to lay tiles on the floor in a bathroom, toilet, or other room. The most commonly used technologies are:
- Seam to seam, or butt. The most popular and simplest option is when the seams between all the tiles form straight lines. To simplify and adjust the gaps, special mounting beacons, crosses, or other elements are used.
- At a run. Each next row of tiles is shifted relative to the previous one. On the floor, this allows you to create an original pattern, often similar to how a solid board or laminate is laid and looks impressive on the wall.
- Diagonal laying. Laying ceramic tiles on the floor diagonally means that they will be rotated 45˚ relative to the walls. Allows you to divide the room into two functional zones, especially if tiles with different patterns or colors are used.
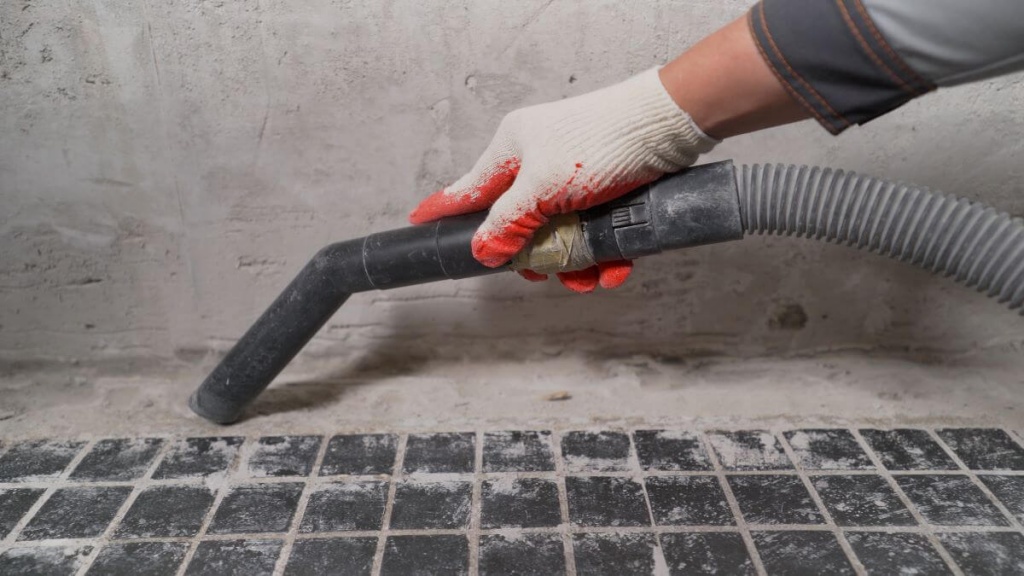
After 24 hours, the glue will gain sufficient strength so that the crosses can be removed and the seams can be rubbed. When calculating a more accurate time, it is necessary to take into account the temperature inside the room. If the room is cold enough, below +10 o C, more time may be required.
Read more: DO-IT-YOURSELF TILE GROUTING