We tell you why sound insulation is installed under the ceiling and what it can be like. We offer useful instructions for the self-installation of a soundproofing structure.

One of the main disadvantages of apartment buildings is high audibility. And if music in the evening or construction work is not often heard, then the sounds of footsteps and other movements on the floor will be a constant background in apartments with poor sound insulation. To solve this problem, you need to install a layer of insulation. Let’s look at all the intricacies of installing soundproofing on the ceiling in an apartment.
Why should you install soundproofing?
Let’s start with the theory. Our ear picks up vibrations of particles that travel through the air or
any objects. The eardrum recognizes them and converts them into sound. If the wave propagates through objects, we hear impact noise. Thus, partitions and ceilings spread just such an impact sound. This is the “sound” of repair work, footsteps, and the movement of furniture on the floor covering. Impact noise is considered the strongest and most unpleasant for humans.Another possible way of transmitting a sound wave is through air. This is how screams, music, singing, etc. are transmitted. This “sound attack” is usually weaker, but also quite sensitive. In addition, indirect sound transmission is possible, when a sound wave propagates over contacting surfaces. That is, it is reflected not only from the ceiling but also from the walls or floor. Properly selected and installed sound insulation will help protect against noise in any of the cases described above. You just need to take into account all the “noisy” factors.
What is effective sound insulation?
The maximum effect will be achieved by complete sound insulation, which is mounted on walls, partitions, and ceilings. But it significantly “eats up” the area of the apartment. You can install partial sound insulation, which will cover only one or several surfaces. They must be the source of noise waves. Often the insulation is installed in the ceiling structure, which allows you to get rid of airborne and impact sound coming from above. The efficiency of the system depends on the type of building.
- Brick. Walls and ceilings have a non-uniform structure, which reduces the indirect transmission of sound waves. Ceiling insulation will give a good effect.
- Panel. All elements of the building have the same structure, which allows sound waves to quickly spread along the walls and ceilings; moreover, they are also reflected from surfaces. Therefore, only comprehensive sound insulation of the walls, ceiling, and floor in the apartment is needed.
- Monolithic frame. The difference in thickness makes it possible to transmit sound vibrations from massive floors to thin partitions. For high-quality sound insulation, you need to install insulation on the partitions and ceiling.
Types of insulation
To install ceiling sound insulation, choose one of two possible methods. Let’s look at both in more detail.
Frameless
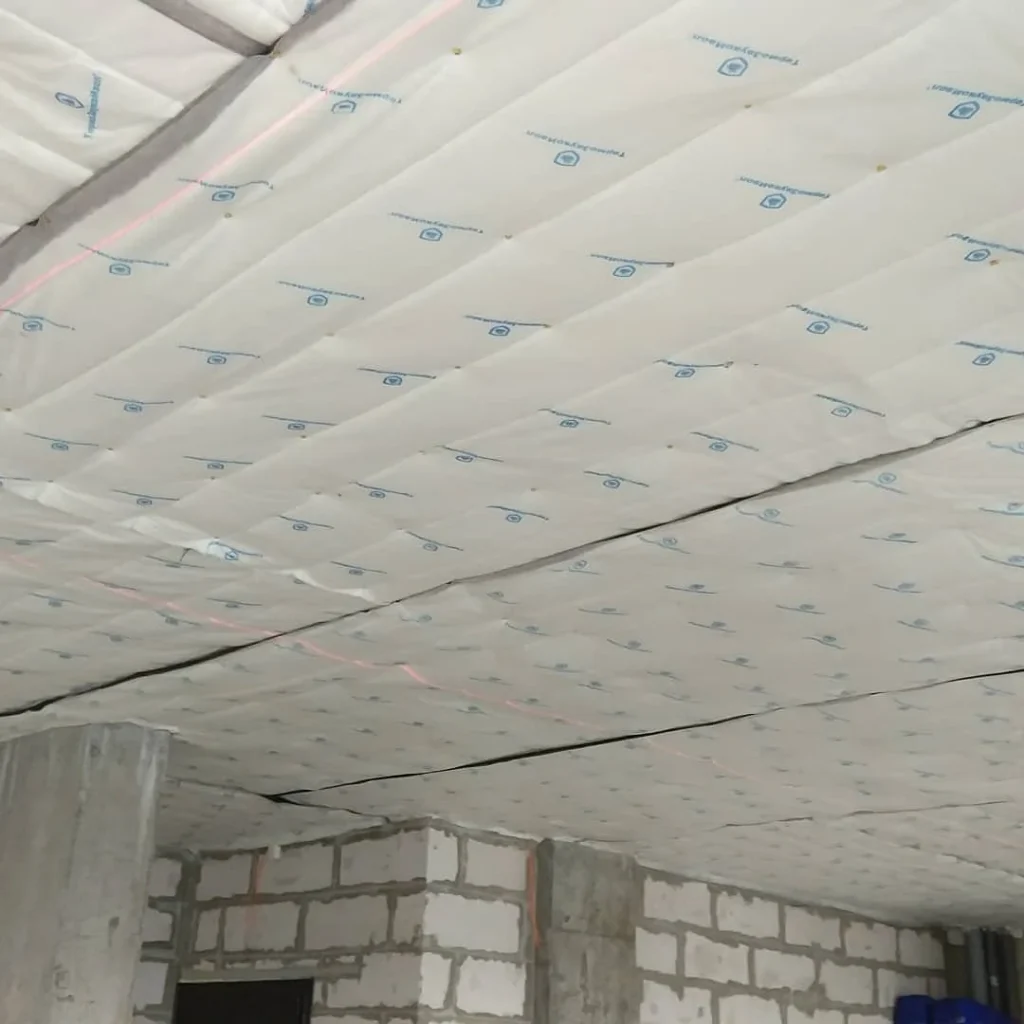
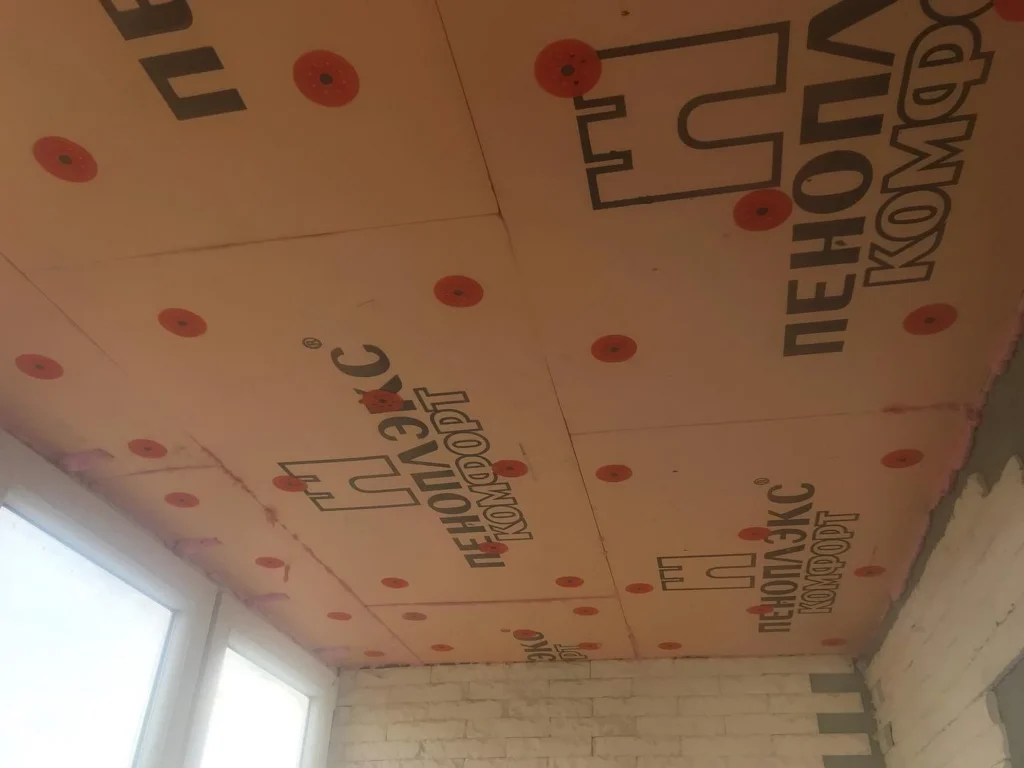
Sound insulation is fixed directly to the ceiling covering. In this way, rigid acoustic panels or loose soft insulation are attached.
Pros
- “Eats” is the minimum height of the room, which is important for rooms with low ceilings.
- Less labor-intensive installation, since no additional frame is needed.
- Cheaper than frame construction.
Minuses
- Inability to lay utility lines along the ceiling.
- Only a fairly thin layer of insulation can be laid, which negatively affects efficiency.
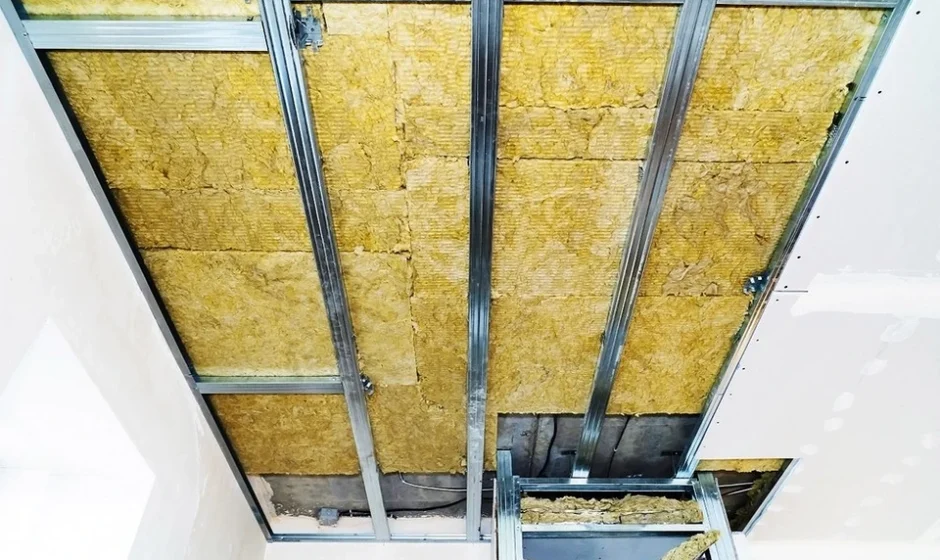
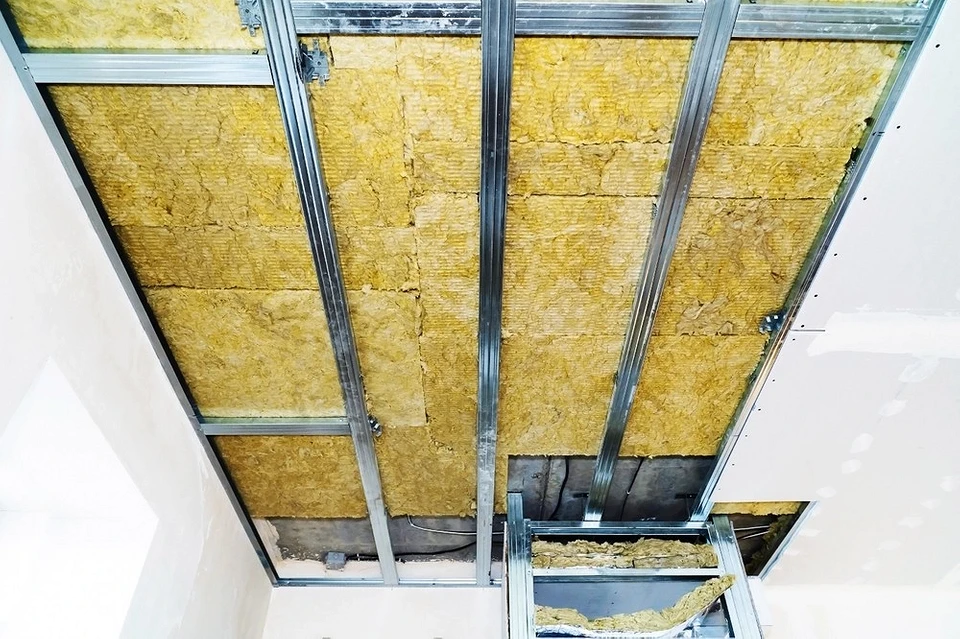
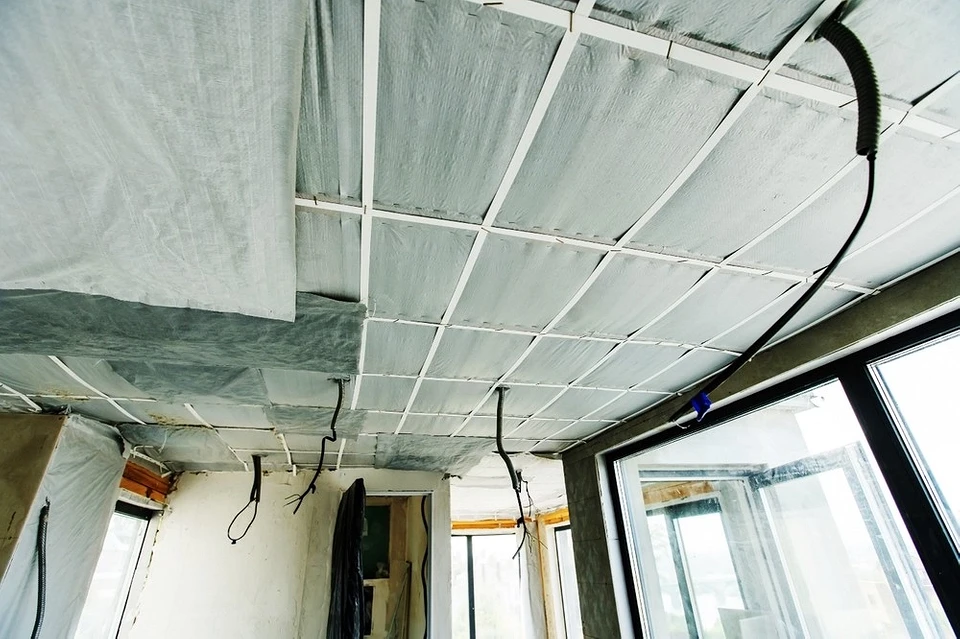
Frame
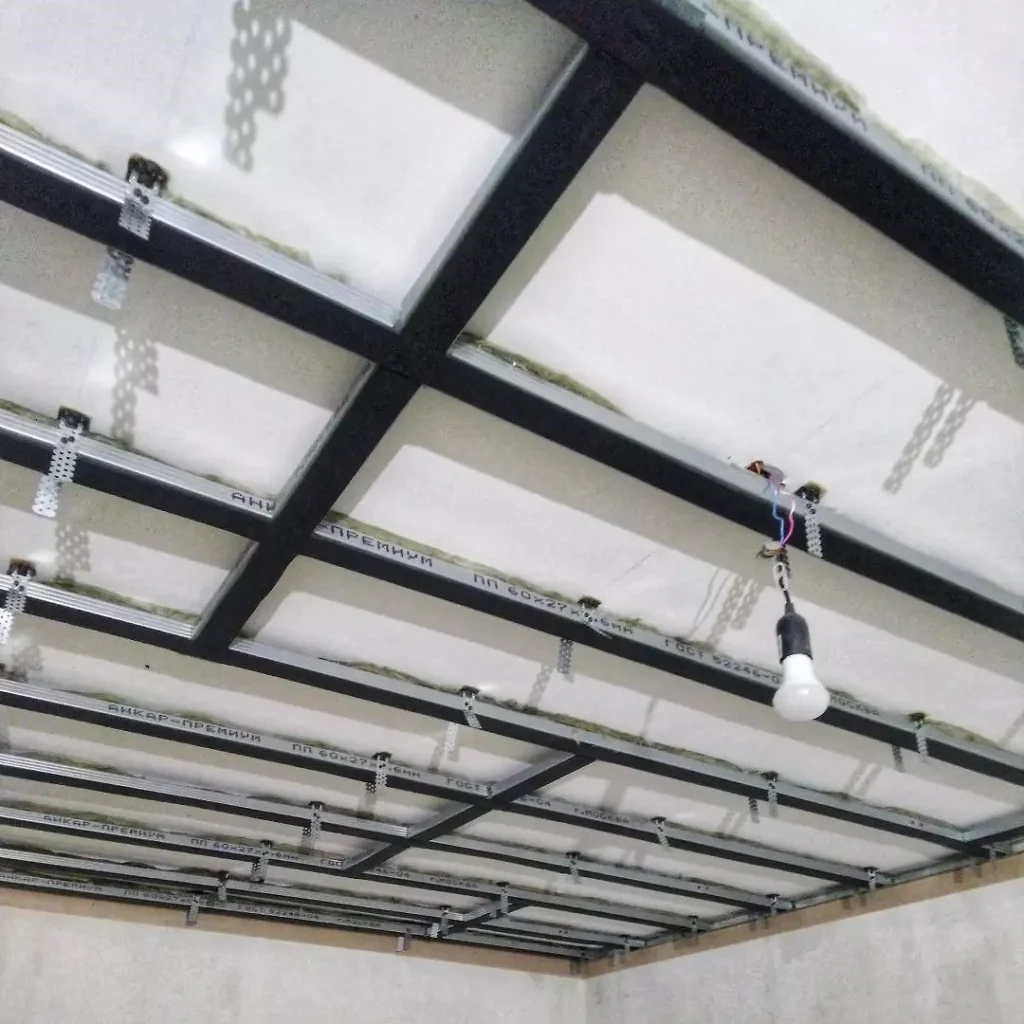
According to reviews, this is the best option for soundproofing from neighbors in an apartment. To arrange the insulation system, a frame is assembled from a metal profile. Loose acoustic insulation is inserted inside and sewn up with special noise-insulating material. During the assembly process, vibration suspensions, vibrating washers, and substrates are used.
Pros
- Gives a good sound insulation effect due to the use of several sound-absorbing layers.
- It is possible to conceal wires or other communications.
- Minimal finishing of the ceiling, since the surface is smooth, without height differences.
Minuses
- Difficult installation.
- High cost of materials and labor.
- Reduces the height of the room by several centimeters.
The frame system gives the best result but also requires large financial costs and complex installation. True, if you wish, you can assemble it yourself. If you need a budget, but are acceptable in terms of efficiency, option for soundproofing the ceiling in an apartment from neighbors with your own hands, choose a frameless method. Both options are suitable for subsequent stretching of any type of ceiling fabric. The frame system is convenient in that it can be covered with soundproofing plasterboard, which is subsequently finished for painting and painted.
Materials for soundproofing the ceiling in an apartment
For sound insulation, materials of different thicknesses, sound absorption, and installation methods are produced. Let us briefly describe the most effective of them.
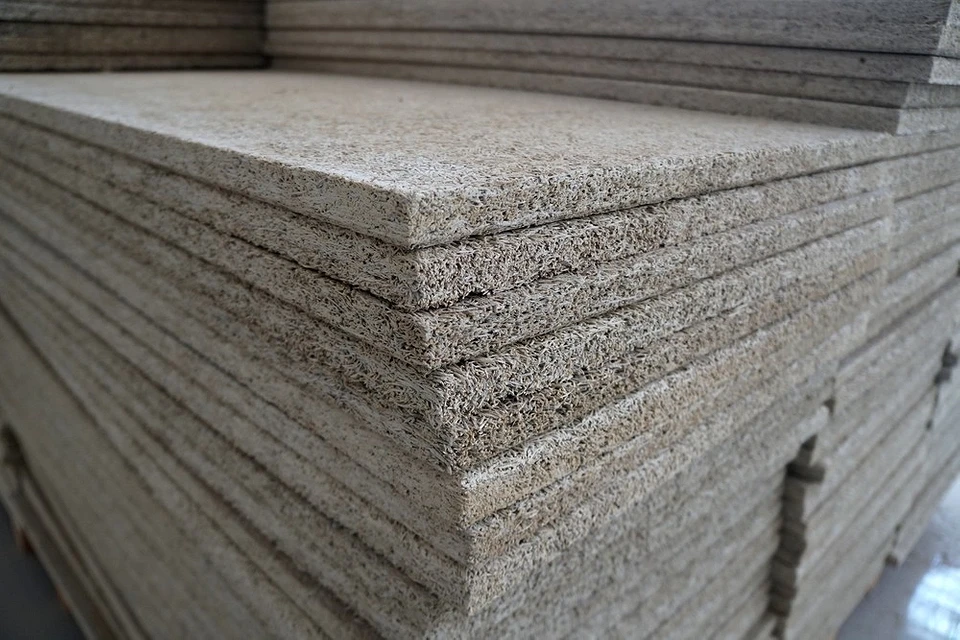
- Fiberboard. It can be different: fiberglass, mineral wool, ecowool. It is optimal to choose slabs with a density of 45 kg/cu.m. m and above, and insulation height in the range of 30-50 mm.
- The membrane is polymer, also acoustic. Self-adhesive argonite-based fabric, maximum thickness – 3.6 mm. Models are produced with a felt backing, which significantly improves the sound insulation characteristics of the material. The membrane is used only in combination with other insulation, otherwise, its effect is very low.
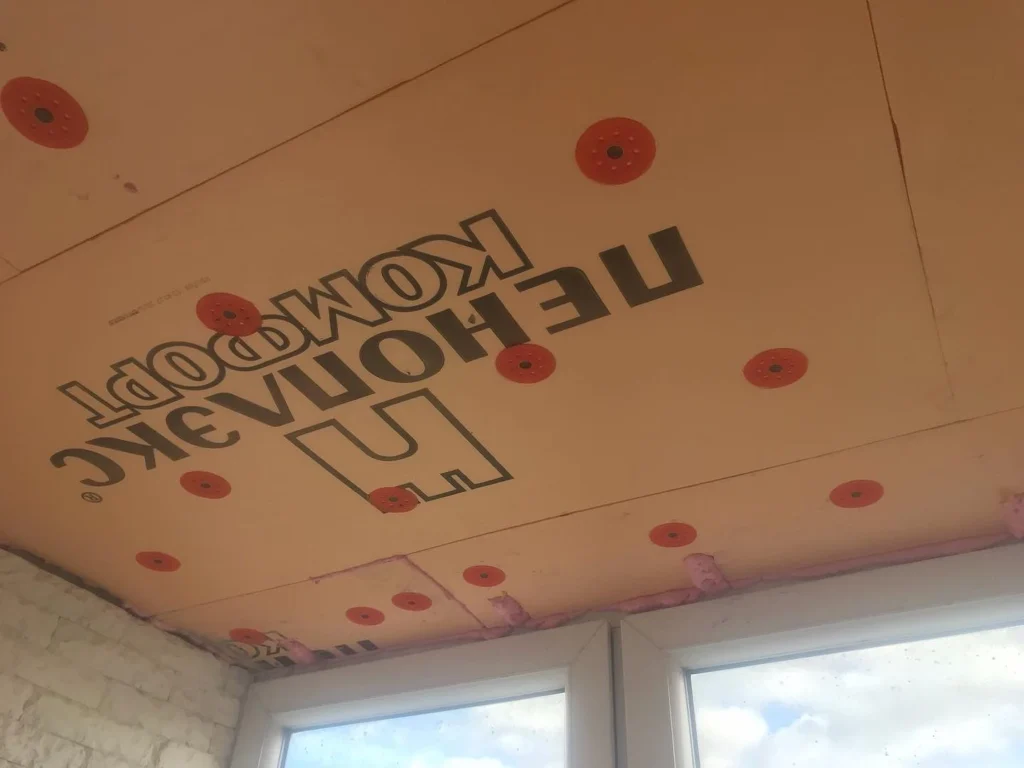
- ZIPS panel. Fiberboard, which is covered with sheets of gypsum fiber. Panel thickness – from 50 to 130 mm. The thicker it is, the better the soundproofing characteristics.
- Polystyrene, foam plastic. Rigid insulation made of dense polymers. Lightweight, easy to install, moisture resistant. Plastics are flammable, so they are used with caution in living rooms. They protect well from impact noise, but worse from airborne noise.
How much will it cost to soundproof the ceiling in an apartment with a suspended ceiling?
The cost of an insulation system depends on its type, room size, and insulation materials. For frame systems, the cost of the metal profile, vibration suspensions, and fasteners must be added to the price of the material. On average, the price of a basic frame structure, consisting of two levels of soundproofing plasterboard.
A system of fiber acoustic boards and one layer of gypsum plasterboard will cost more. If you lay a membrane with a felt backing as the first layer, then put in fibrous acoustic boards cover it all with gypsum plasterboard, and put elastomer instead of rubber in the base of the vibration suspensions.
Step-by-step instructions on how to assemble a soundproofing system yourself
Both insulation options can be installed independently. We have prepared two simple instructions.
Frameless system
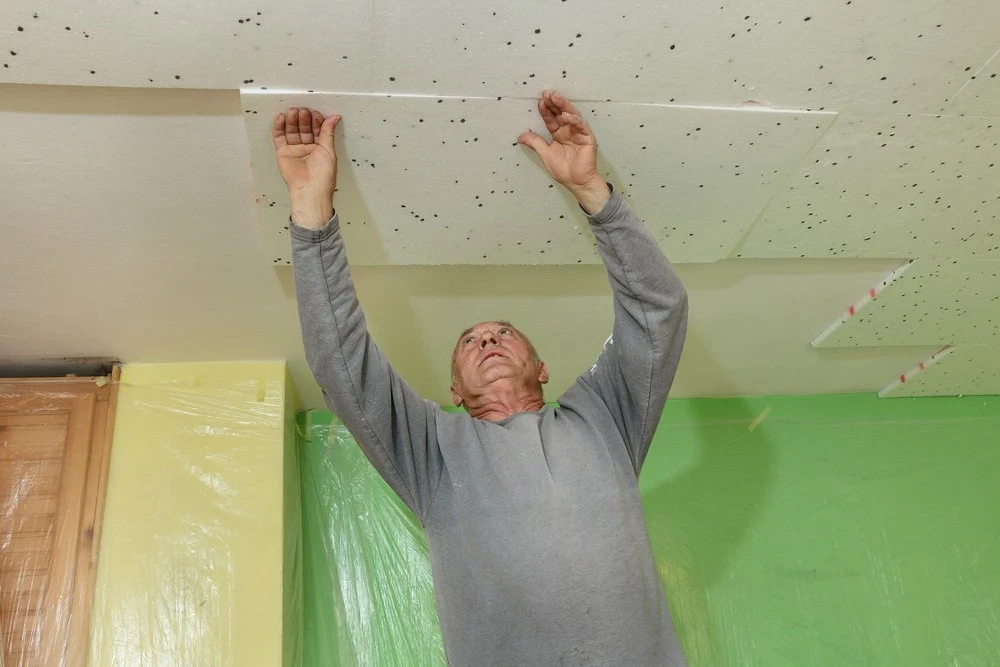
The technique is suitable for laying insulation with a density of at least 30 kg/m3. m. It is attached to a gypsum or cement adhesive mortar. To strengthen the fixation, you can additionally install mushroom dowels, but then you will have to drill the base. Five fasteners are placed on each of the plates: on the corners and in the center. Installation is carried out in the following sequence.
- Clean the base of the old finish, being sure to remove any loose layers. Clean and seal all cracks, crevices, and other defects. The surface must be smooth, without flaws.
- Clean the surface from dust and dirt. The easiest way to do this is with a stiff brush. The old whitewash also needs to be cleaned or washed off, otherwise, the insulation will not stick well.
- Prime the base with a suitable preparation. Apply the primer to the ceiling surface, covering 15-20 cm of the wall height along the entire perimeter. After the first layer has dried, apply the second.
- Prepare the adhesive paste for use. Dilute the powder with water strictly according to the instructions. Mix the finished mastic.
- Start laying from the corner. Take an embossed spatula and use it to apply glue to the ceiling base. Work an area slightly larger than the slab size.
- Place the panel on the base coated with glue and gently press it down. Try to distribute the force evenly. Hold it like this for two to three minutes so that the mastic sets.
- Prepare the area for gluing the next board. Glue it in the same way as the first one. Coat the panel joints with sealant.
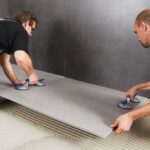
Apply insulation throughout the room, trimming the boards if necessary. If necessary, additionally secure the material with mushroom dowels. After the adhesive paste has dried, you can begin finishing: install a suspended ceiling or suspension system with gypsum plasterboard or, if polystyrene insulation was used, putty it and paint it.
Frame method
Suitable for installation of multi-layer insulation. You can choose different options for insulating materials: rolls, slabs, etc. Installation is carried out in the following sequence.
- Prepare the base. Strip it off the old finish, and repair all flaws and defects. Treat the joints of the ceiling and walls, and corners. Fill small cracks with mortar, and blow out large cracks with foam.
- Prime the ceiling surface with a suitable primer. Apply the composition in two layers. Dry the base.
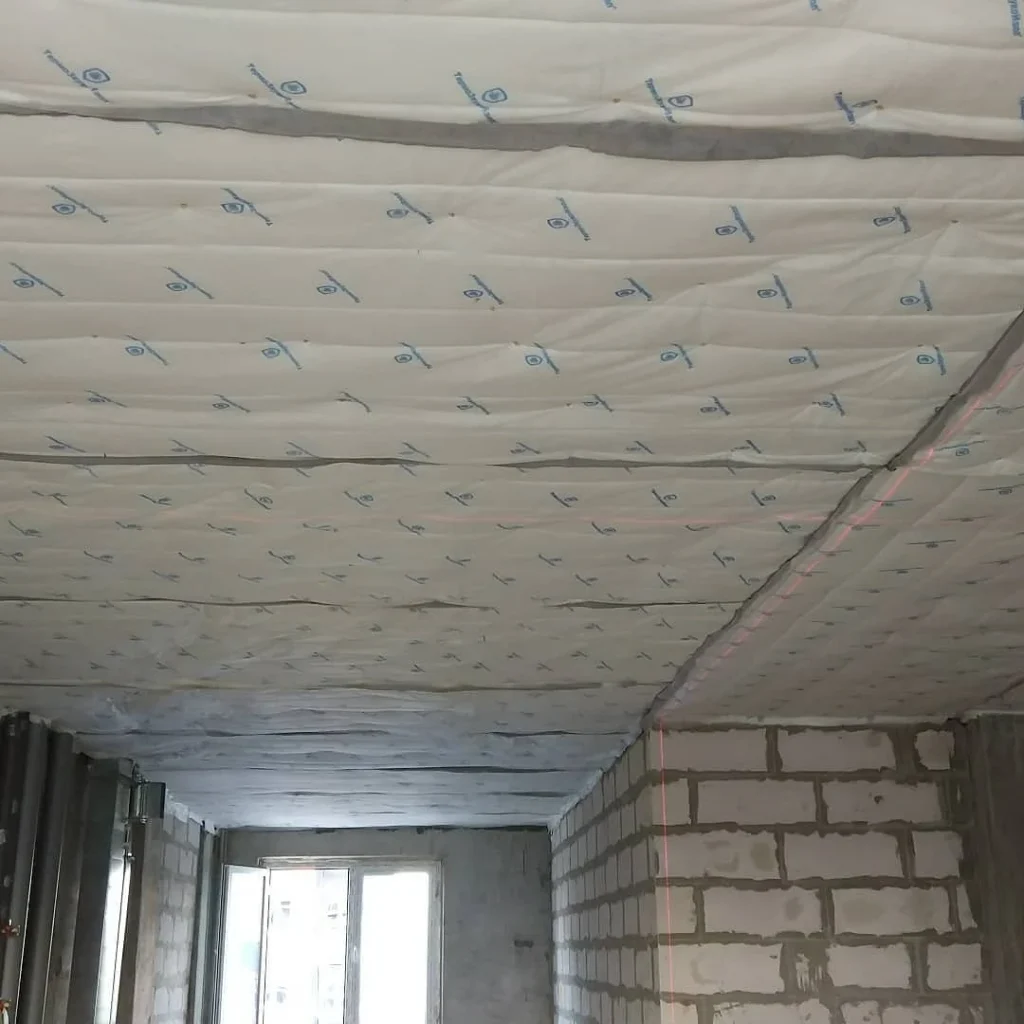
- Glue the acoustic membrane onto the ceiling surface, and lay the strips end-to-end, without gaps. If the material is not self-adhesive, use all-purpose glue. Additionally, secure the insulation with dowels.
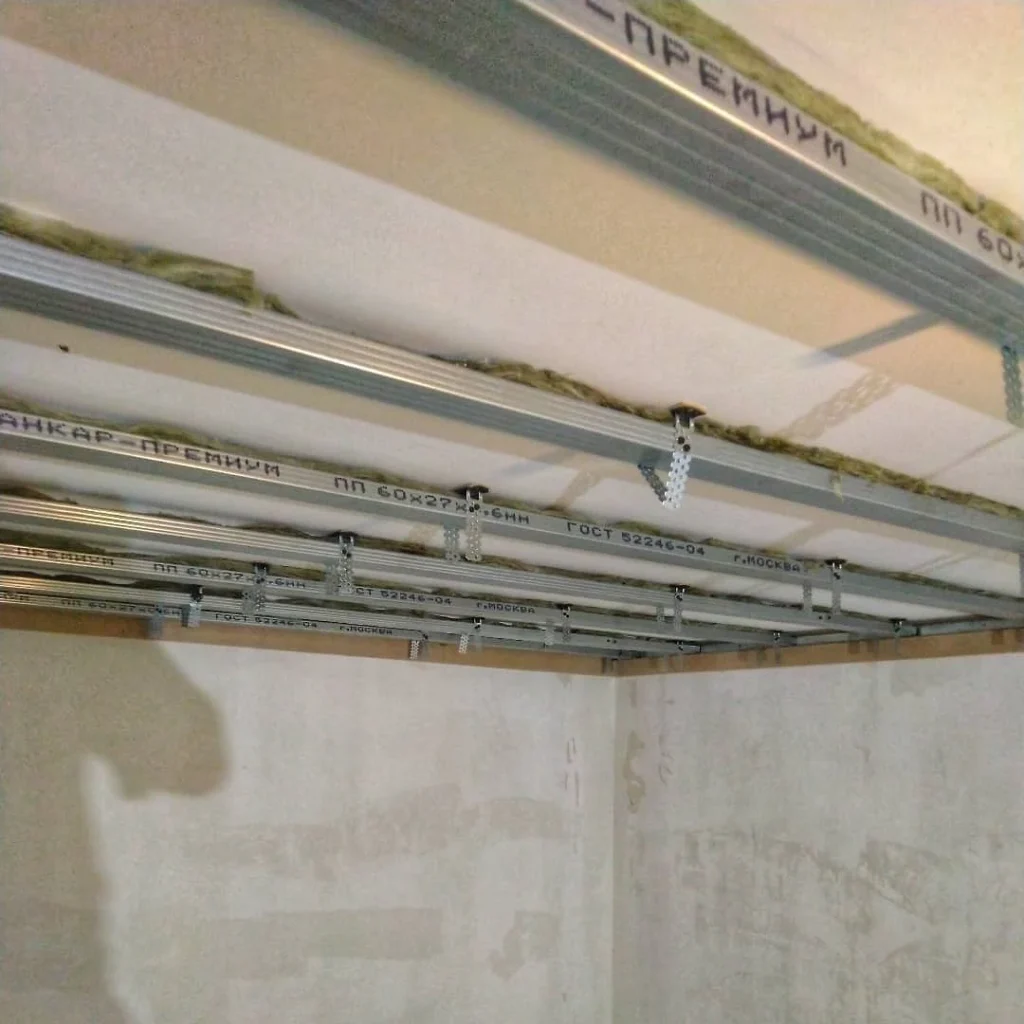
- Mark the base for mounting the frame. Place marks on the fastener installation areas. The pitch for the guides should be equal to the width of the insulation minus 2 or 3 cm.
- Open the guides. Apply a tape made of foamed polyethylene to the back side of the metal profile.
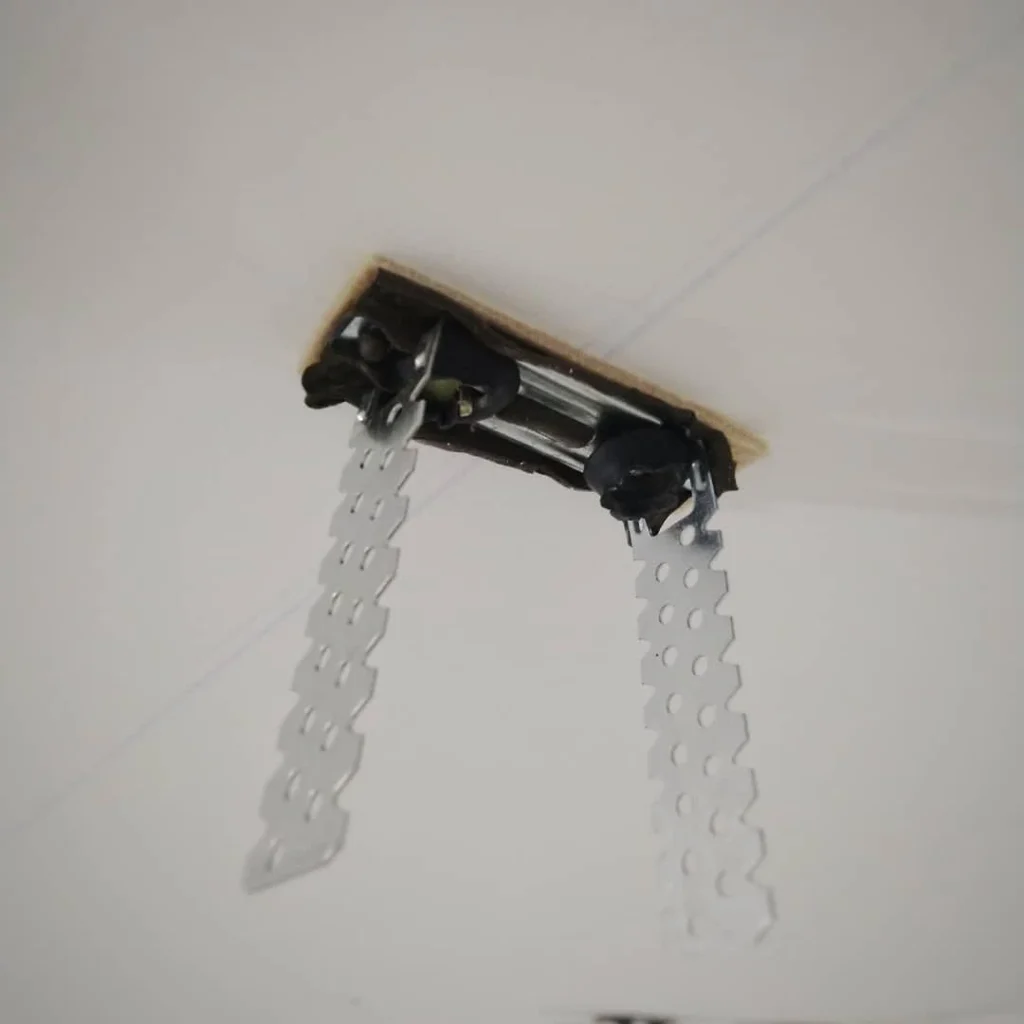
- Install vibration suspensions on the base that will dampen sound waves. Mount them in rows every 0.4 m. The distance between elements in a row is 0.6 m. Fix the vibration suspensions to wedge anchors.
- Assemble the frame. To do this, install some of the guides in vibration suspensions, and mount the rest around the perimeter of the walls. Insert the profiles into the guides and secure them with fasteners.
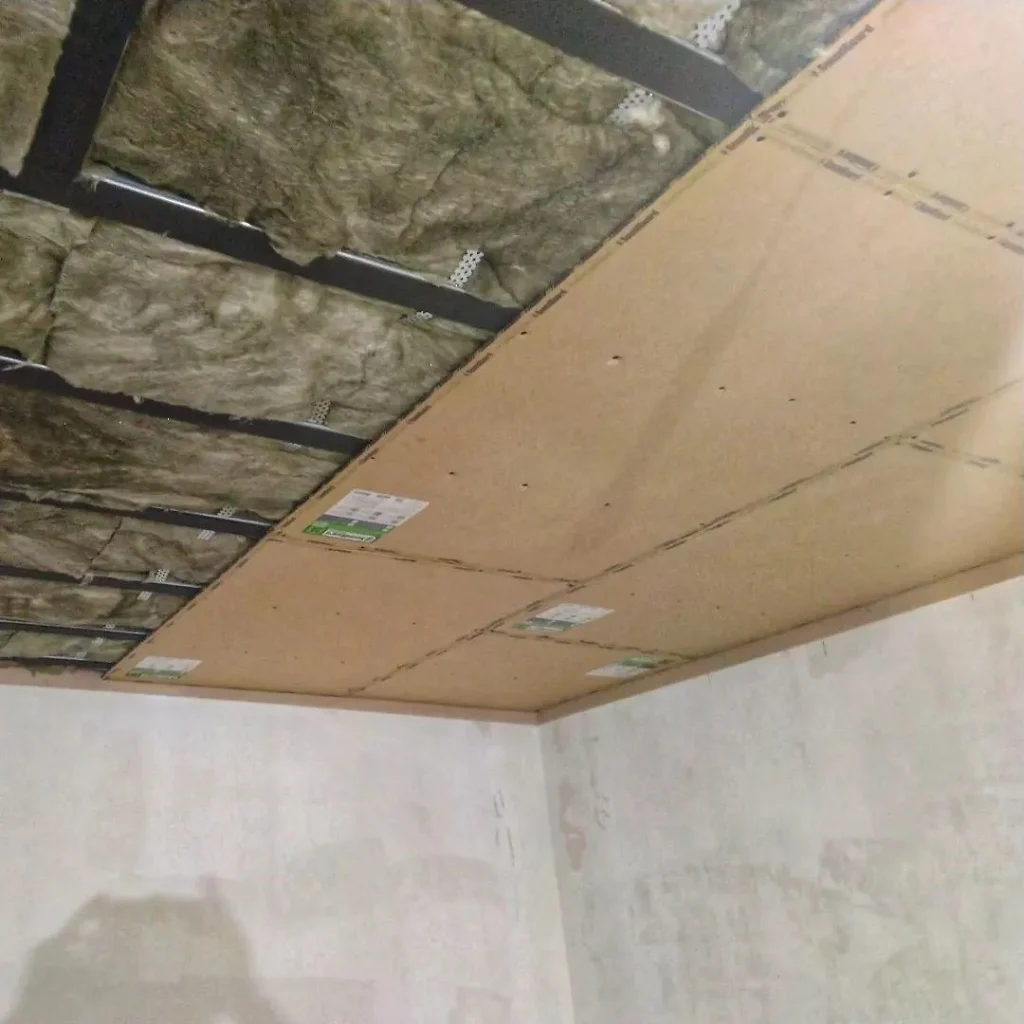
- Place insulation inside the resulting frame. Lay the material tightly, seal the joints with acrylic-based sealant.
- Cover the frame with plasterboard sheets and secure them with self-tapping screws.
You can cover the structure with ordinary plasterboards and stick another layer of acoustic membrane on them. After this, add another layer of gypsum plasterboard. Drywall can be finished for painting and painted or mounted on any suspended ceiling.