We talk about the features of laying aerated concrete blocks, give detailed installation instructions, and analyze possible mistakes.
Aerated blocks are a universal material from which residential buildings, outbuildings, garages, extensions, and cellars are erected. It benefits from good density, low weight, precise geometry, and a large selection of sizes. Another advantage is the ability to lay aerated concrete blocks yourself. Let’s look at all the features of this process.
What to prepare for work
They start with the selection and purchase of gas blocks. This is an artificial stone belonging to the group of foam concrete. It is obtained from a mixture of sand and cement. Reagents are added to it, which foam the raw materials. The air bubbles resulting from foaming are evenly distributed throughout the mass. This determines the lightness of the material and its high-insulating characteristics.
Three types of aerated concrete blocks are produced. Thermal insulating materials have the lowest density and are used as insulation. Structural and thermal insulating aerated concrete is more dense. It can be used as an insulator and as a building material for partitions and other lightly loaded elements. Structural blocks have maximum density and strength. Used in construction. All types of gas blocks are produced in different sizes, which allows you to choose the most suitable option for your construction.
It is important to choose the brand of material. Different brands of aerated concrete vary in density, and the area of application depends on this. For example, low-density insulating or structural-thermal-insulating blocks cannot be used for the construction of load-bearing walls. It is necessary to calculate the loads and obtain recommendations from specialists regarding the brand.
Special glue is used for masonry (except for the first row). When laid correctly, it produces a seam height of only 1-3 mm. The glue is made from high-quality Portland cement with various additives, including thermal insulation. After hardening, thin seams give the effect of a monolithic wall with heat loss of no more than 10%. If you lay aerated concrete on a cement-sand mixture, like an ordinary brick, the thickness of the joints will increase significantly. Cold bridges inevitably form, which increases heat loss by up to 30%.
Relatively recently, the list of what kind of mortar aerated concrete blocks are placed on has been supplemented with foam. It does the job well and is easy to use, but has not yet stood the test of time. It is recommended to be used when installing self-supporting walls and partitions. In other cases, it is better to use special adhesives. Homemade mixtures of cement and sand, and all tile adhesives should be eliminated immediately.
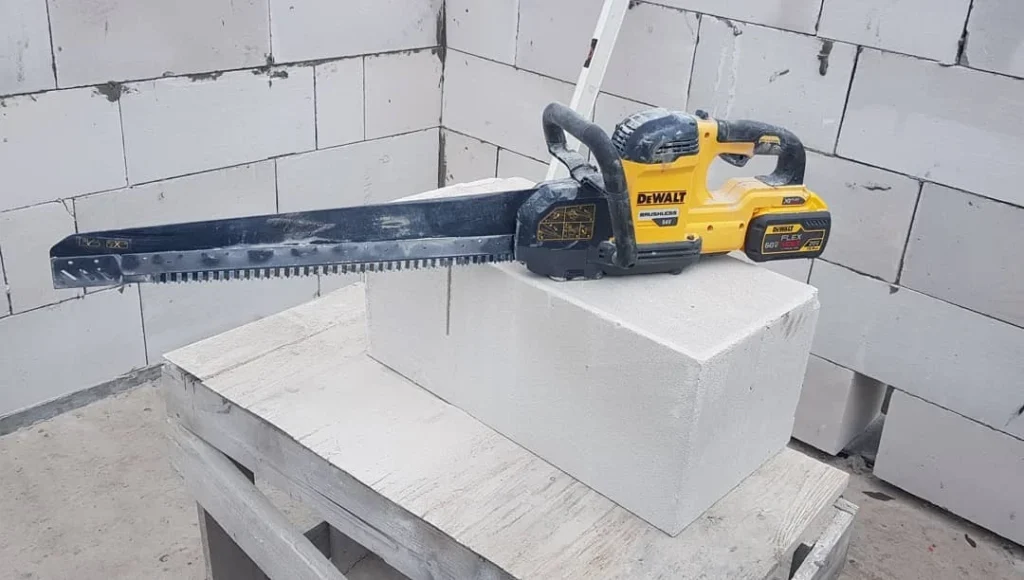
The set of tools for laying aerated concrete blocks includes a notched trowel or ladle for distributing the solution and a trowel for applying it. You will need a special hacksaw for trimming, a rubber mallet for correcting the element on the masonry, and a wall chaser for making grooves for reinforcement. In addition, you need to prepare marking cords, a level or laser level, a bucket and drill mixer for diluting the mixture and reinforcing bars.
The technology of laying aerated concrete blocks
After everything necessary is prepared, installation begins. We will analyze in detail all stages of installation.
1. Preparing the base
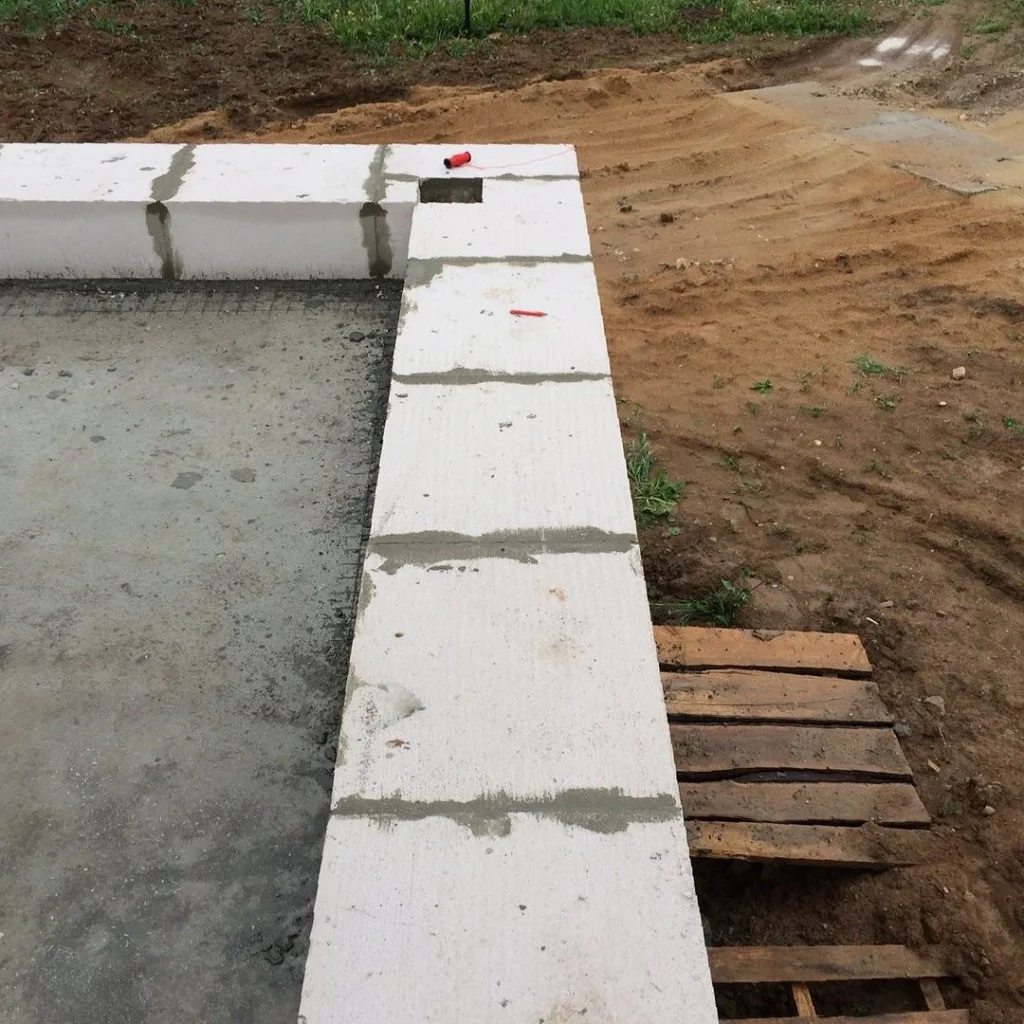
Aerated blocks are laid on the foundation. It should be perfectly smooth. This is necessary because even minor distortions will cause cracks to form. And not only along the masonry lines but also inside the aerated blocks. Therefore, they start with measurements of the foundation. Check the accuracy of its geometry. If any violations are identified, they are corrected. The surface of the base is leveled: the bulges are removed with a grinder, and the recesses are filled with solution.
Cut-off waterproofing is applied to the prepared foundation. This is also a necessary stage of work. Aerated blocks are hygroscopic. Once saturated with water, they begin to collapse. Therefore, it is important to block capillary moisture from the foundation from accessing the building material. To do this, one, or preferably two, layers of cut-off waterproofing are mounted on the surface of the base. These can be cement-based penetrating solutions, coating bitumen mastics, or pasting sheets. The insulation is given time to fully cure.
After this, they begin marking. With its help, the installation points of the corner elements are determined. To do this, determine the position of the walls. It’s done like this. Pegs are driven into the corners of the foundation. Screws are screwed into them and the marking cords are attached to them. Their intersection points fall on the corners of the house. These areas are marked; this is where the corner elements will be laid. There should be no mistakes, so the markup is double-checked and necessarily verified with the project.
2. Laying the first row
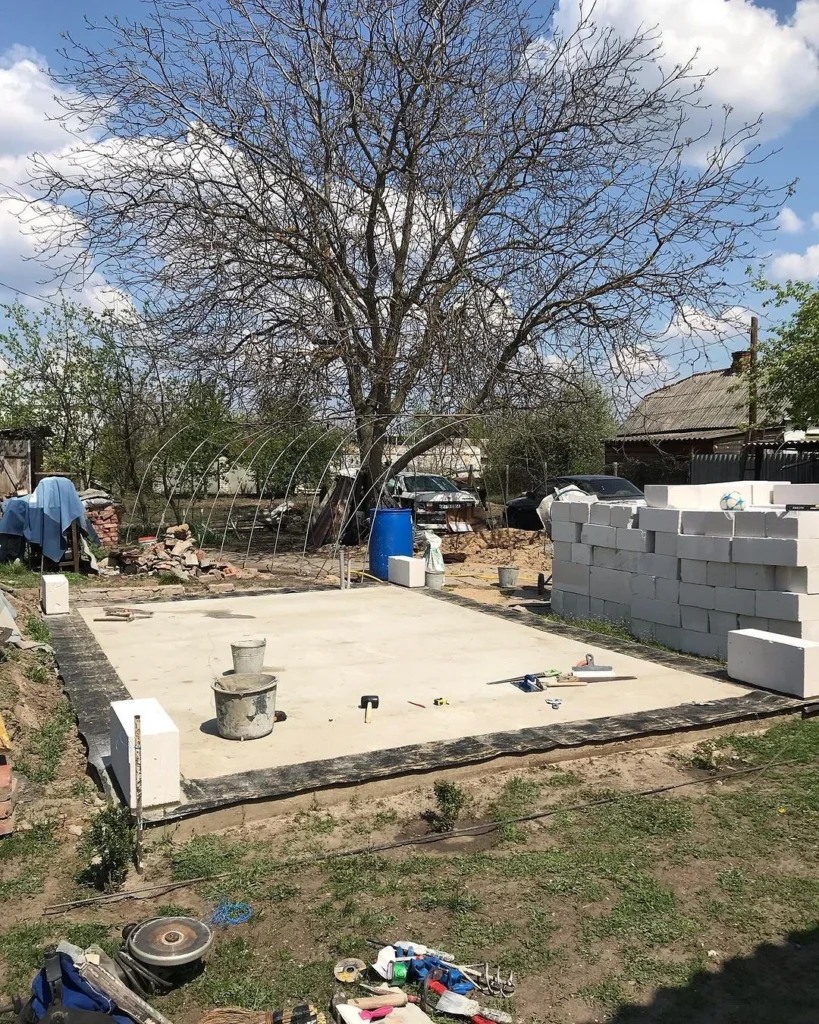
Let’s figure out how to lay aerated concrete blocks. The first corner element is placed in the highest corner of the foundation. Then, using a laser level, the height level mark is transferred to all other corners. All corner gas blocks are placed using a level strictly in the same plane. A deviation of no more than 2 mm is allowed. They are mounted on a cement-sand mixture, and the position is adjusted with a mallet. After all the elements have been set, the accuracy of the installation is checked again with tools, and work is stopped for three to four hours. During this time, the solution will be set and the parts will be fixed in place.
The first row is laid out between the corner pieces. The guideline is a stretched marking cord. The installed aerated blocks should not pull it back or be located at a large distance from the thread. If this happens, this is a signal that the series is shifting. The parts of the first row are mounted on cement mortar. The seam turns out to be quite thick, but this is necessary to level out even small unevenness of the base.
Each part is cleaned of dust before installation. To do this, run over it with a spatula or a stiff brush. The solution is applied to the lower part of the stone, placed on the base, and the position is adjusted. To create a sealed vertical seam, a thin layer of special glue is applied between two adjacent parts on the end of the installed element. To do this, press a trowel with adhesive mastic to the bottom of the part and forcefully move it upward without tearing it off.
The next gas block is installed in the same way. It is placed on the solution so that it rises slightly above the already mounted block. Then the joint is adjusted and the stone is lowered into place with a mallet. The installation accuracy is controlled by level. Using this technology, the entire first row is laid out.
If the whole part does not fit, it is trimmed. This is done with a special hacksaw. Start cutting from the edge: to ensure an even cut, it is advisable to use a special template. The vertical walls of the cut stone are lubricated with glue before installation. Then they put it in place and remove any excess mastic that appears. After the row has been laid, work is interrupted for three to four hours until the mixture has set.

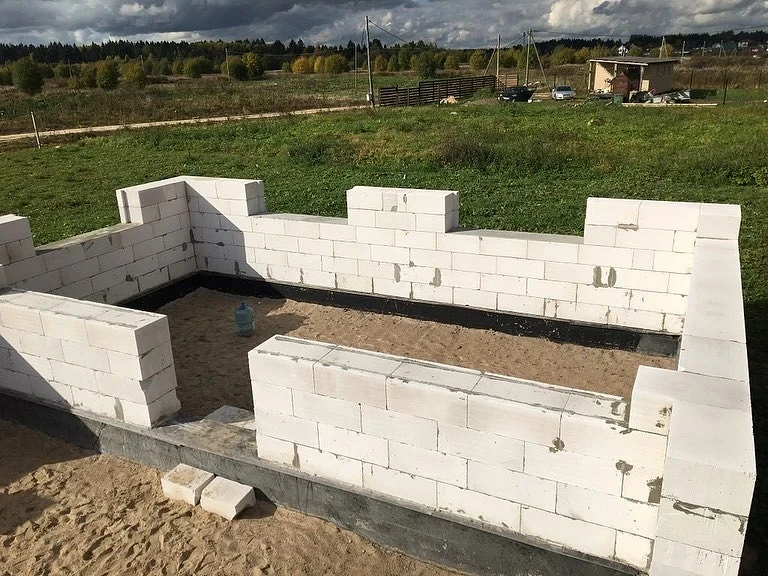
3. Installation of the remaining rows
Before laying each subsequent row, the surface of the previous one must be prepared. All possible irregularities at the joints or base are carefully trimmed off with a special plane. Its peculiarity is that the cutting teeth are installed at different angles and directed in different directions. Therefore, after grinding, only small strips remain on the surface. They are cleaned with an abrasive attached to a sanding board. Dust generated during work must be removed.
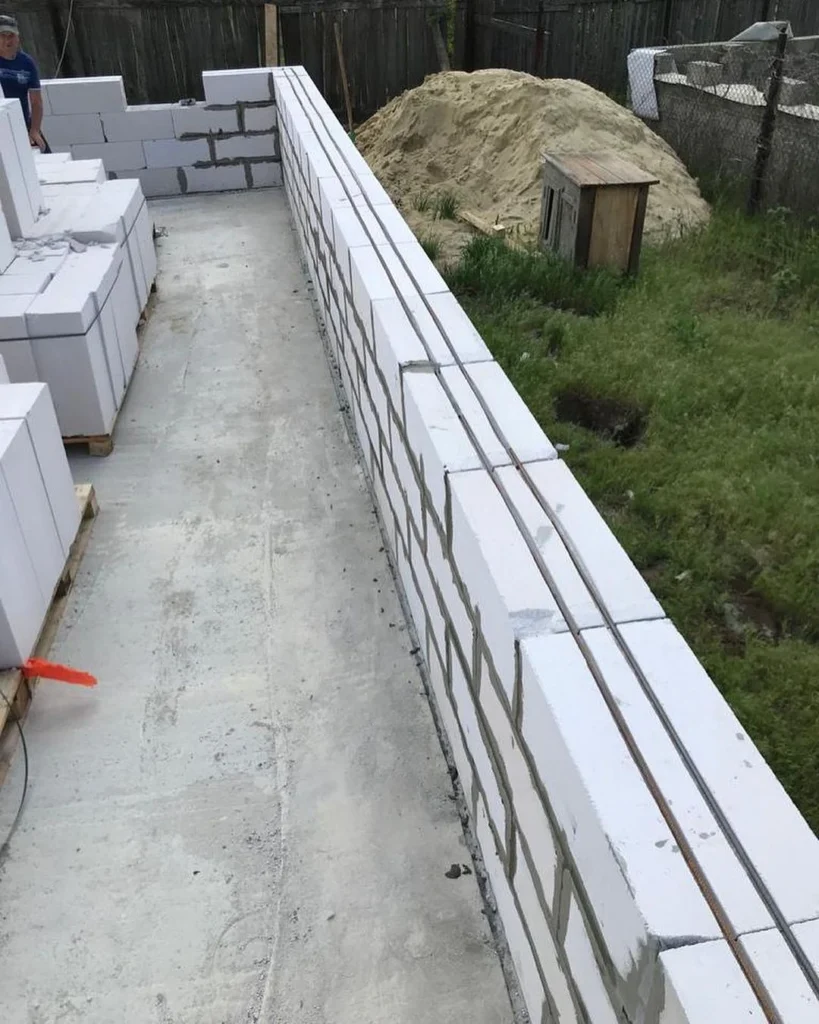
To ensure that the finished masonry is resistant to bending loads, row ligation is used. This means that the position of the elements of each subsequent row is shifted relative to the previous one. The magnitude of this shift may vary. The average displacement is 80-120 mm. Installation begins with the installation of corner parts. They are put in place and the position is controlled by level. After this, a cord is pulled between them, which is used as a guide during installation.
Laying aerated concrete blocks with your own hands on an adhesive mixture has some peculiarities. Using a spatula or ladle, apply the mastic over the entire surface to be glued so that there are no dry areas left. They put the part in place and correct its position. The exposed glue is carefully removed with a spatula and placed in a container. During the work, be sure to check the correctness of the masonry. It’s done like this. As a rule, they lean against the finished wall and place a level on top. The permissible vertical deviation is no more than 1.5-2 mm per 200 cm of wall height. If the deviations are within the acceptable range, continue work. If not, they redo it.
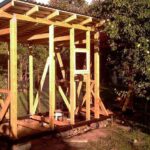
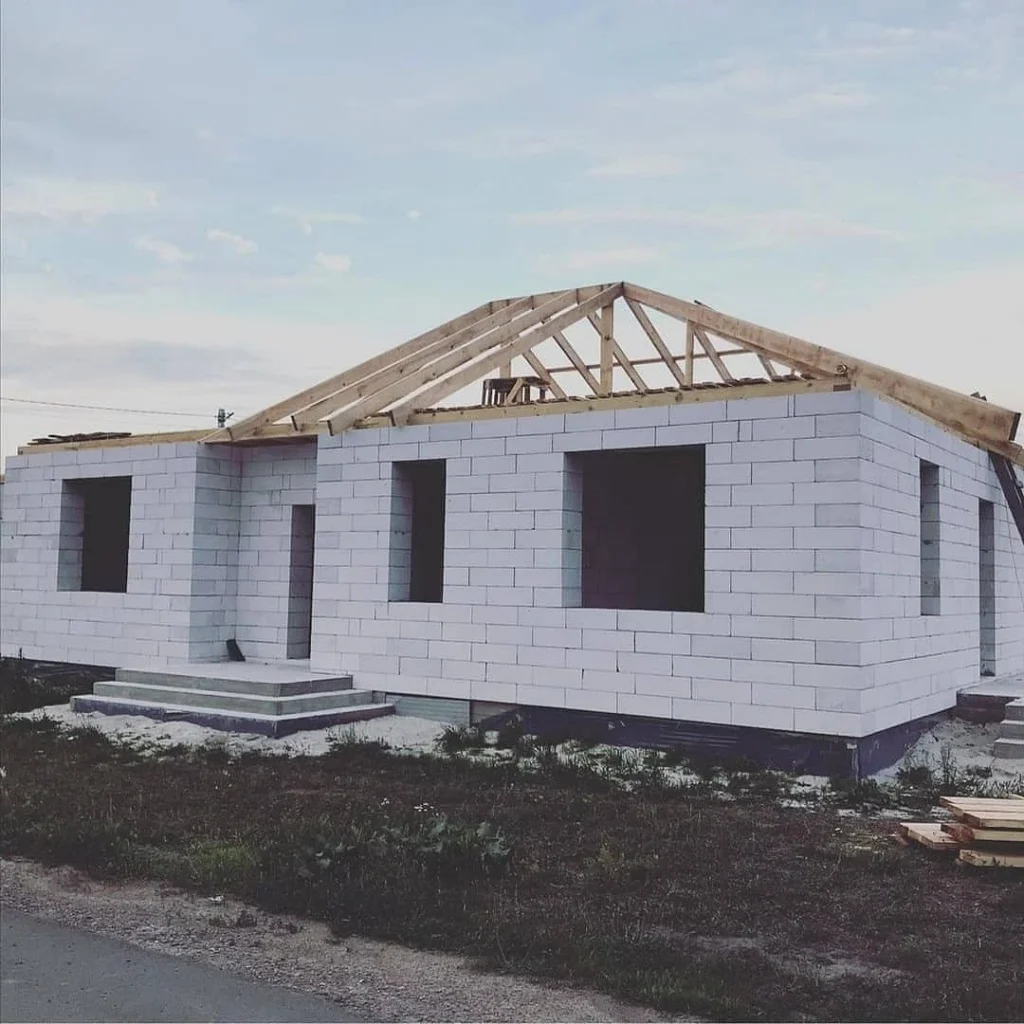
Reinforcement is used to strengthen the masonry. There is an opinion that it is necessary to reinforce every third or fourth row. However, if the strength of aerated blocks is chosen correctly, this will be unnecessary. Be sure to reinforce openings and areas where point loads occur. For example, where beams, rafters, and lintels rest on aerated concrete. In such cases, in the previous row to the reinforced section, grooves are made for the reinforcement. Their length on both sides should exceed the length of the opening or lintel by 50 cm. Rods are placed in the grooves and sealed with cement mortar.
Independent laying of aerated blocks is quite possible, even if there is no experience in such work. For installation, you need to choose only high-quality material. The geometry of low-quality block stone is imprecise, so the seams will be thick and uneven. This will increase glue consumption and reduce the quality of the masonry.
Another common mistake is the lack of waterproofing. Don’t neglect this moment. Aerated concrete is quickly destroyed by water, no matter whether it is capillary moisture from the foundation or precipitation falling on its surface. Therefore, the foundation base must be waterproofed, and the erected walls must be covered with finishing.