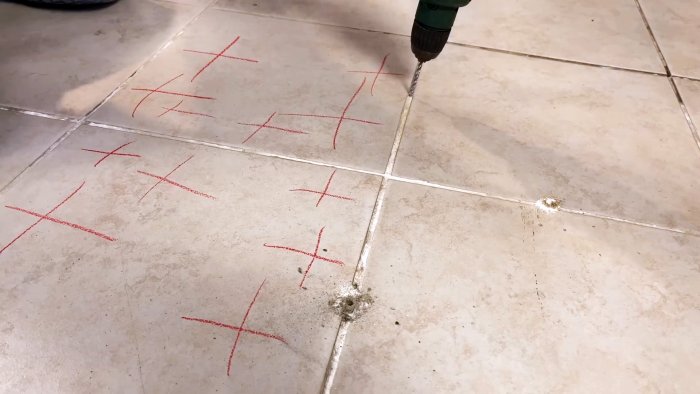
To detect voids under the floor tiles formed during the initial installation, we tap them with an ordinary wooden mallet. Those places that are not filled with adhesive mass give themselves away with a louder and longer sound. We mark such areas with chalk or marker. This will allow us to more accurately determine the scope of upcoming work.
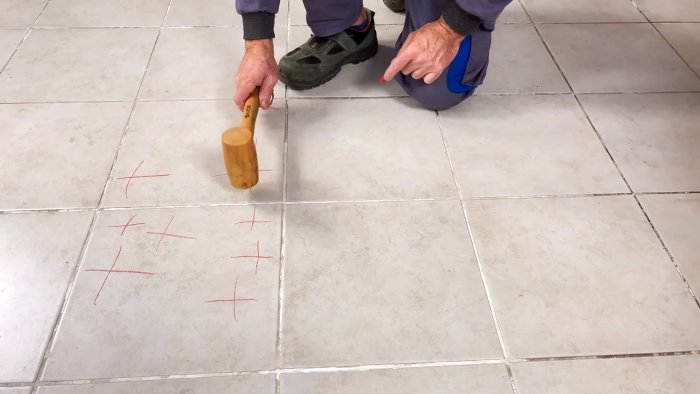
Then we fix an ordinary twist drill in the chuck of an electric drill, the diameter of which should match the nominal width of the seams between the tiles, and drill a system of holes in the seams around the tiles, which we previously marked with crosses.
Using a household vacuum cleaner, carefully remove large particles, small chips, and dust formed during the drilling of holes in the seams, paying special attention to the cleanliness of the drilled holes. There should be no drilling products left in them.
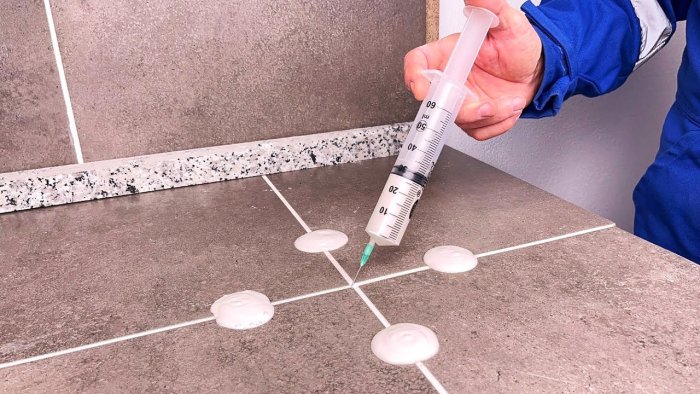
Using clean water and using a construction spatula, in a container of suitable capacity, dilute the dry tile adhesive to the consistency of sour cream, that is, the adhesive mass should not be too thick and sufficiently mobile, otherwise unexpected difficulties will arise with squeezing the tile adhesive out of the tube.
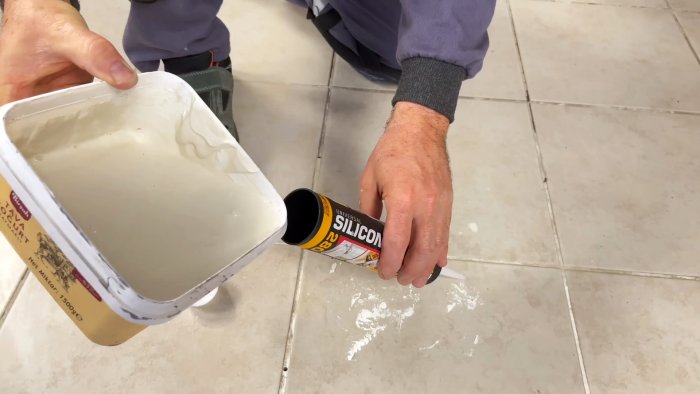
We pour the diluted tile adhesive into a clean tube with a conical extension placed on its spout, for example, from under the silicone sealant, close the piston lid, insert it into the half-open gun and fill all the holes drilled in the seams with liquid tile adhesive.

When filling some holes with adhesive, it may come out of adjacent drillings, which is a signal that there are voids between them connected. This phenomenon is quite useful for our work since it signals the complete filling of the voids located between these two holes.
If new voids are found under the floor tiles, we make additional holes and repeat the process described above. Then, using a spatula, remove excess tile adhesive from the surface of the floor tiles and wipe the work area dry with a soft, slightly damp cloth.
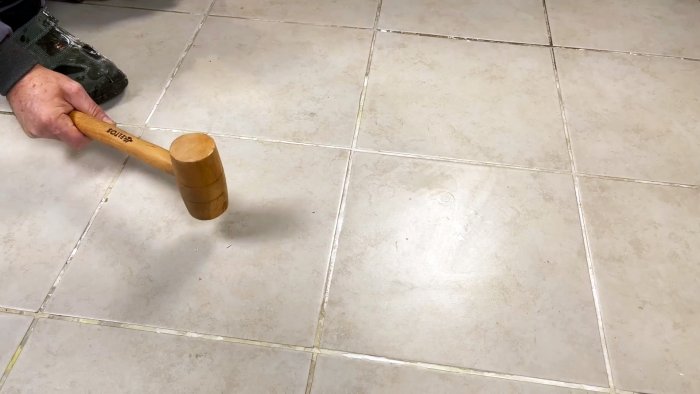
We place massive objects on the surface of the reinforced tiles and keep them in this position for at least 24 hours. Then we check by tapping that there are no voids under the floor tiles using the same wooden mallet. If the sound is the same everywhere, then this confirms the high quality of the work done.
Read more: LAYING TILES: HOW TO GLUE TILES ON THE FLOOR, ON THE WALL