

During renovations, you may find yourself needing to remove tiles from a wall but want to preserve them for future use. Whether it’s to access utilities or rearrange the tiles, careful removal can save you money on materials. In this article, we’ll explore effective methods for removing tiles without damaging them, ensuring they can be reused later.
When Can Tiles Be Removed Without Damage?
Before beginning, assess whether it’s realistic to remove the tiles without causing damage. If the tiles were poorly installed, they may be easier to detach. Additionally, the type of adhesive used and the wall material play a big role. Tiles fixed with weaker adhesives are easier to remove, while those fixed with cement-based mixtures might crack more easily.
The type of wall surface matters too—removing tiles from concrete or brick is generally easier than from drywall. Over time, the adhesive weakens, making tile removal easier. If the tiles were installed recently, the chances of preserving them are much higher.
Tools You’ll Need:
- Spatula or Putty Knife
- Chisel and Hammer
- Thick Wire or Cable
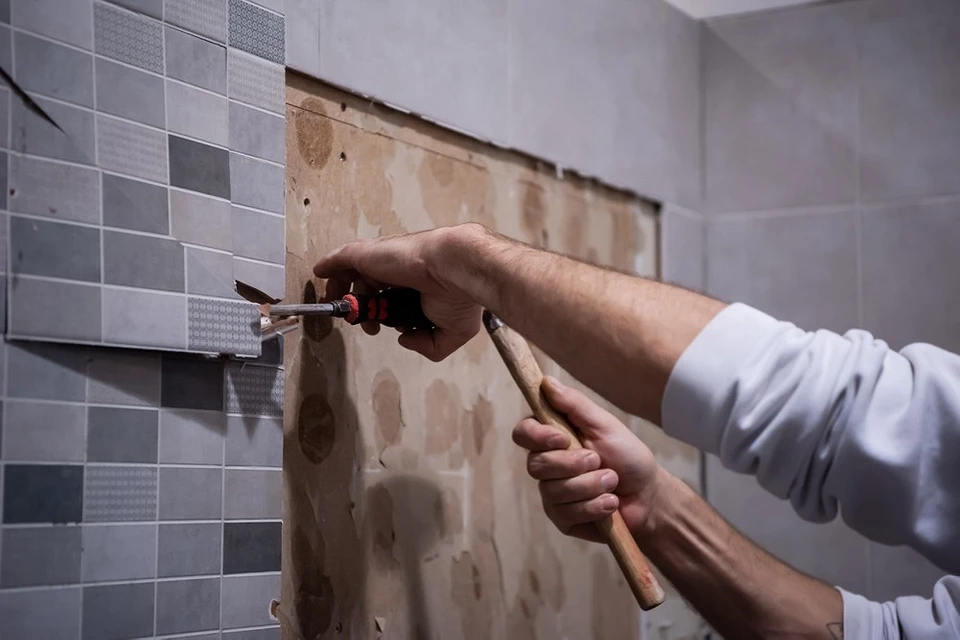
- Utility Knife or Screwdriver
- Safety Gloves
- Safety Glasses
- Respirator Mask
- Protective Film to cover surrounding areas
1. Removing Tiles with a Spatula
This method is ideal for tiles that are attached with soft adhesives, especially on drywall.
Step-by-Step:
- Prepare the Area: Lay down protective film to cover the floor and surrounding surfaces.
- Insert the Spatula: Carefully slide the spatula under the edges of the tile and gently work it deeper.
- Side-to-Side Motion: Slowly rock the spatula back and forth to loosen the tile from the adhesive.
- Continue the Process: Move around the tile until it’s fully detached.
Tip: Use a wide, sturdy spatula to prevent bending, which could cause the tile to crack.

2. Removing Tiles with a Chisel and Hammer
If the adhesive bond is strong, and the spatula method doesn’t work, a chisel and hammer can be more effective.
Step-by-Step:
- Position the Chisel: Place the chisel under the edge of the tile, holding it at a 45-degree angle.
- Tap Gently: Use a hammer to tap the chisel, applying light, even pressure to break the adhesive bond.
- Switch Sides if Necessary: If one side doesn’t seem to budge, try another edge of the tile.
- Be Gentle: Use steady, repeated taps rather than forceful hits to avoid cracking the tile.
Tip: If the tiles are thin, use a rubber mallet instead of a regular hammer to reduce the risk of breaking.

3. Removing Tiles with Wire or Cable
For a more unusual but effective method, you can use thick wire or a cable to remove tiles. This works well if the tiles are tightly adhered and need to be handled carefully.
Step-by-Step:
- Prepare the Wire: Cut a piece of wire slightly longer than the tile and bend the ends to form hooks.
- Insert the Wire: Place the wire beneath the tile’s edge, then gently pull it back and forth to detach the tile.
- Pull Carefully: Ensure you’re pulling perpendicular to the wall to avoid cracking the tile.
Tip: If you don’t have a suitable wire, a strong, thin cable can work as well. Use gentle, sawing movements as you pull.

General Tips for Successful Tile Removal
- Protect Surrounding Areas: Always cover the floor and nearby furniture with protective film to keep them safe from dust and debris.
- Safety First: Wear gloves, safety glasses, a respirator, and thick clothing to protect yourself from sharp edges and dust.
- Soften the Grout: Before removing tiles, soak the grout with soapy water or a specialized grout remover. This will make it easier to scrape off using a utility knife or spatula.
- Start from the Edges: Begin tile removal from the edges or from tiles you’re less concerned about. This helps prevent damage to tiles you want to reuse.
- Work Slowly: Avoid using excessive force when removing tiles to prevent them from breaking.
Cleaning the Tiles After Removal
Once the tiles are removed, they will likely have some adhesive residue on them. To clean them, soak the tiles in warm, soapy water or use a solvent that matches the adhesive type. For stubborn adhesive, a scraper or grinder can be used to remove it.
What if You Don’t Need the Tiles?
If you’re removing the tiles simply for disposal or major repairs, you can be a bit more aggressive. Use a chisel and hammer to break the tiles loose. Just remember to wear proper safety gear, as this method involves more force.

