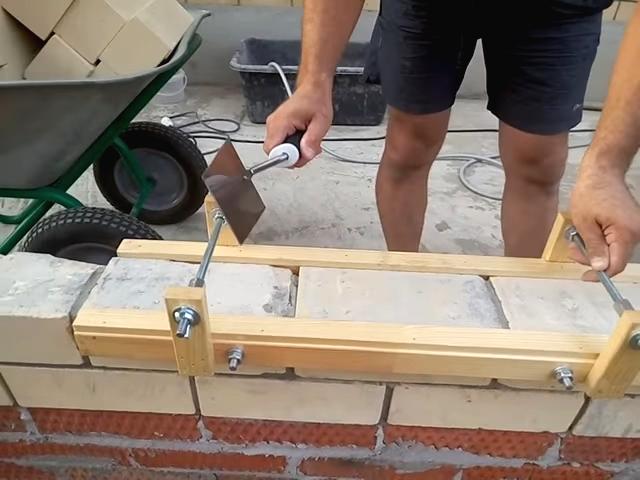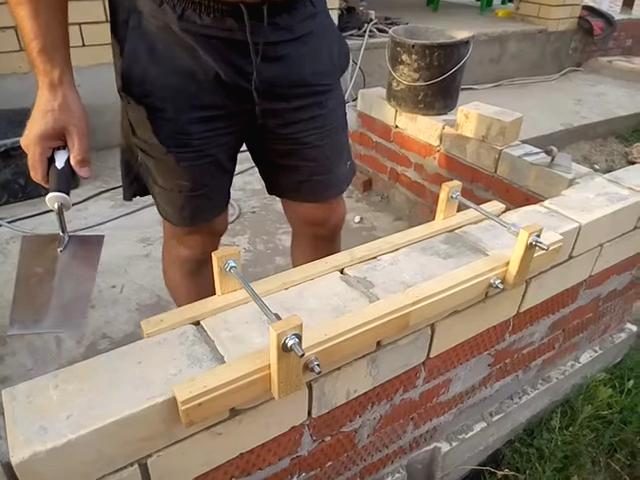
The device is designed for laying bricks to maintain the same thickness of the seam. Thanks to this very simple and uncomplicated design, you can easily make beautiful and very even masonry while maintaining all the distances between the bricks. Moreover, the device greatly facilitates and speeds up the work.
Design
The device consists of:
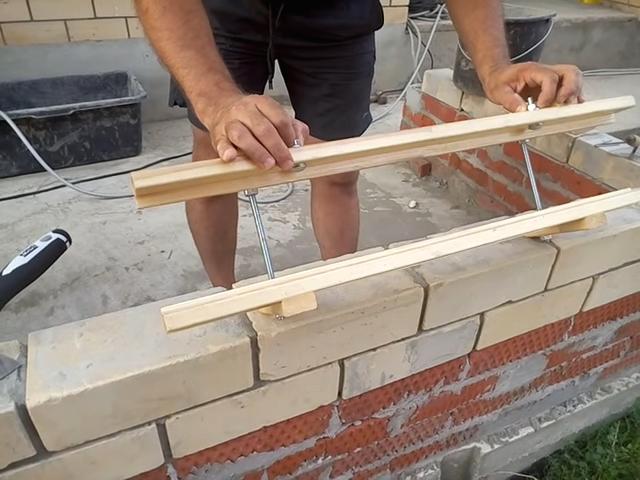
- two horizontal strips 11×25 mm;
- two horizontal strips 19×40 mm;
- four vertical strips 19×40 mm;
- two studs with a diameter of 10 mm with wings, bolts, and nuts, with which the vertical strips are connected;
- two screws with heads with a diameter of 20 mm with nuts and washers;
- 40 mm finishing nails for fastening parts (the ends of the nails on the inside will need to be bitten off with wire cutters).
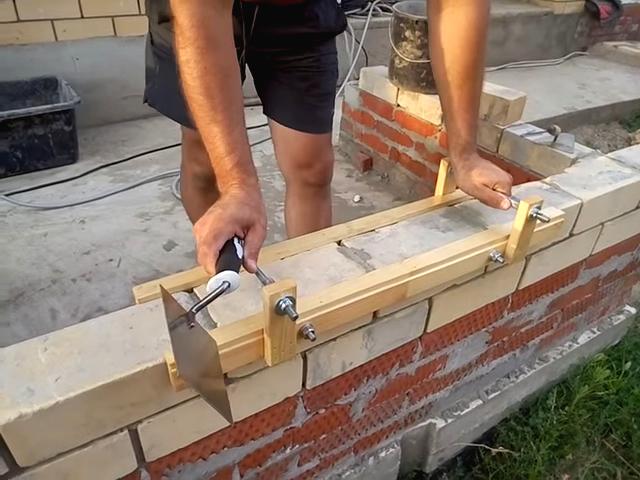

The total length of the structure is 850 mm. Horizontal strips are attached in the shape of the letter G. The areas from the edge to the vertical strips are 130 mm. The height of the vertical strips above the level of the entire structure is 100 mm. This height was chosen so that when laying bricks, the thread would pass 15 mm above the vertical strips and would not interfere with the use of the device. To install vertical strips on the inside of the device, you will need to select two grooves in a horizontal 11×25 mm strip using a chisel.
All wooden parts are made of laminated pine timber. To prevent the absorption of moisture from the solution, the surface is varnished.
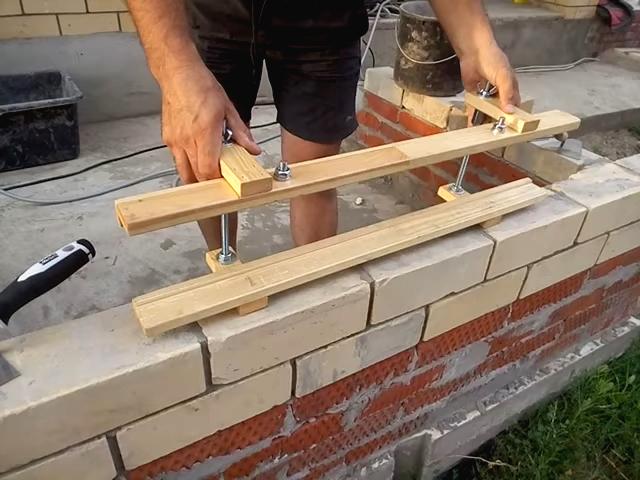
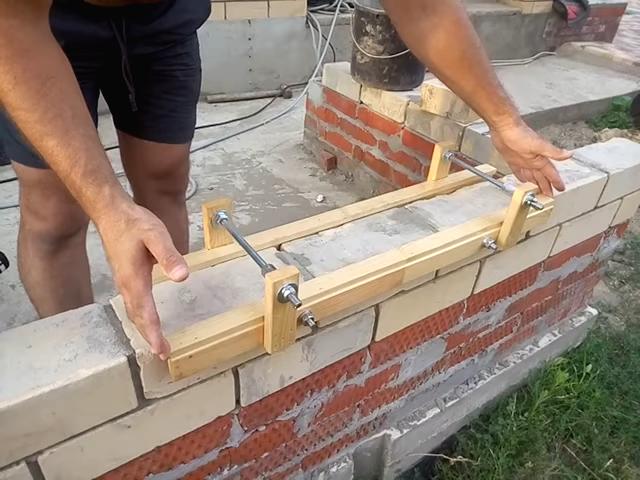

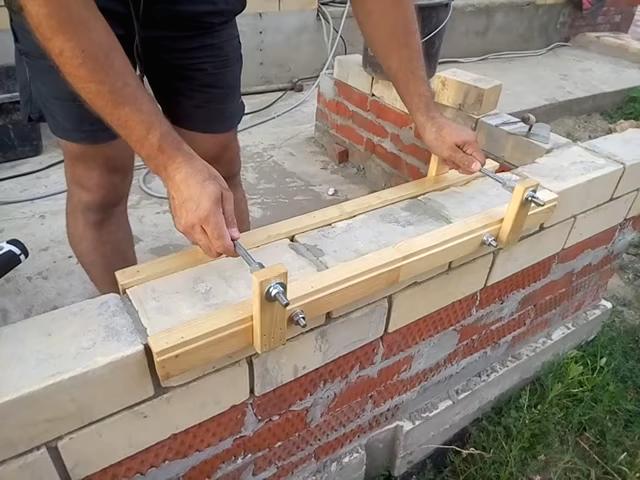
Note: using the thumbwheels on the studs, you can adjust the width of the structure and work with wider or narrower bricks. The inner part is tightly fixed, only the outer side of the device can move.
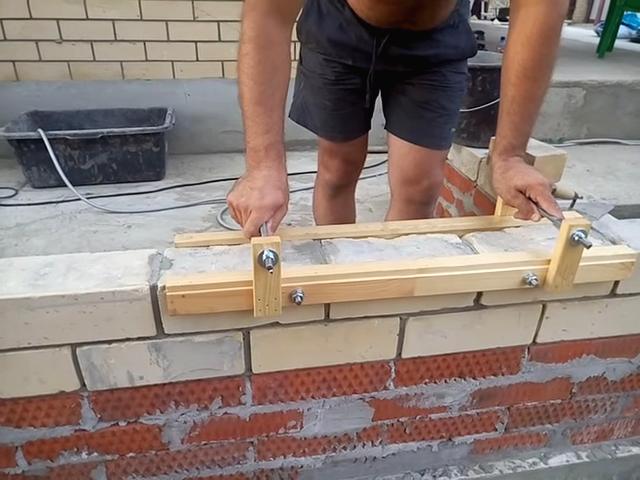
Features of this design
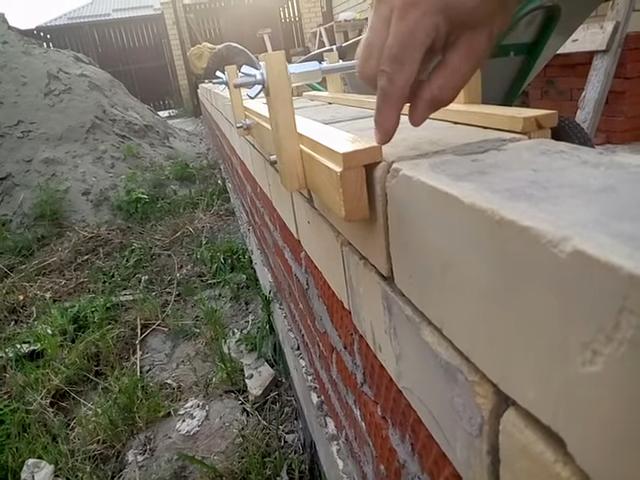
The 11×25 mm internal strip is attached with minimal overlap to the brickwork, just to ensure support on the masonry during work. The second (outer) strip is attached with a maximum possible overhang of 13-15 mm.
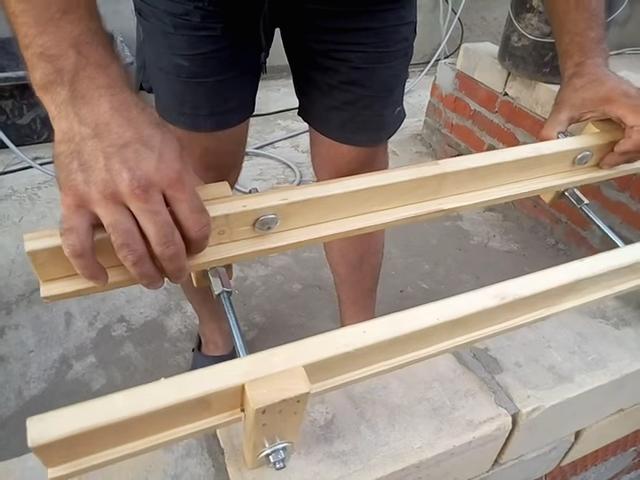
On the outside of the device, at a distance of 30-40 mm from the edge of the vertical strips, screws are inserted with their heads inside through drilled holes. Using washers that need to be added or removed, the screws allow you to adjust the depth of the seam from almost 0 to 15 mm.

Working method
The height of the horizontal planks rising above the masonry is 11 mm. The mortar is applied to the masonry and leveled to the level of the planks, after which the device is pulled further. The overhang from the vertical strips at the edges of the fixture is necessary to perform work on the edge of a brick wall.